Macfriendly.org

Loading

Category Customization & Personalization

Tweaking Icon Sizes on Mac

Tweaking Icon Sizes on Mac

Precise Control: Adjusting Icon Sizes on Your Mac

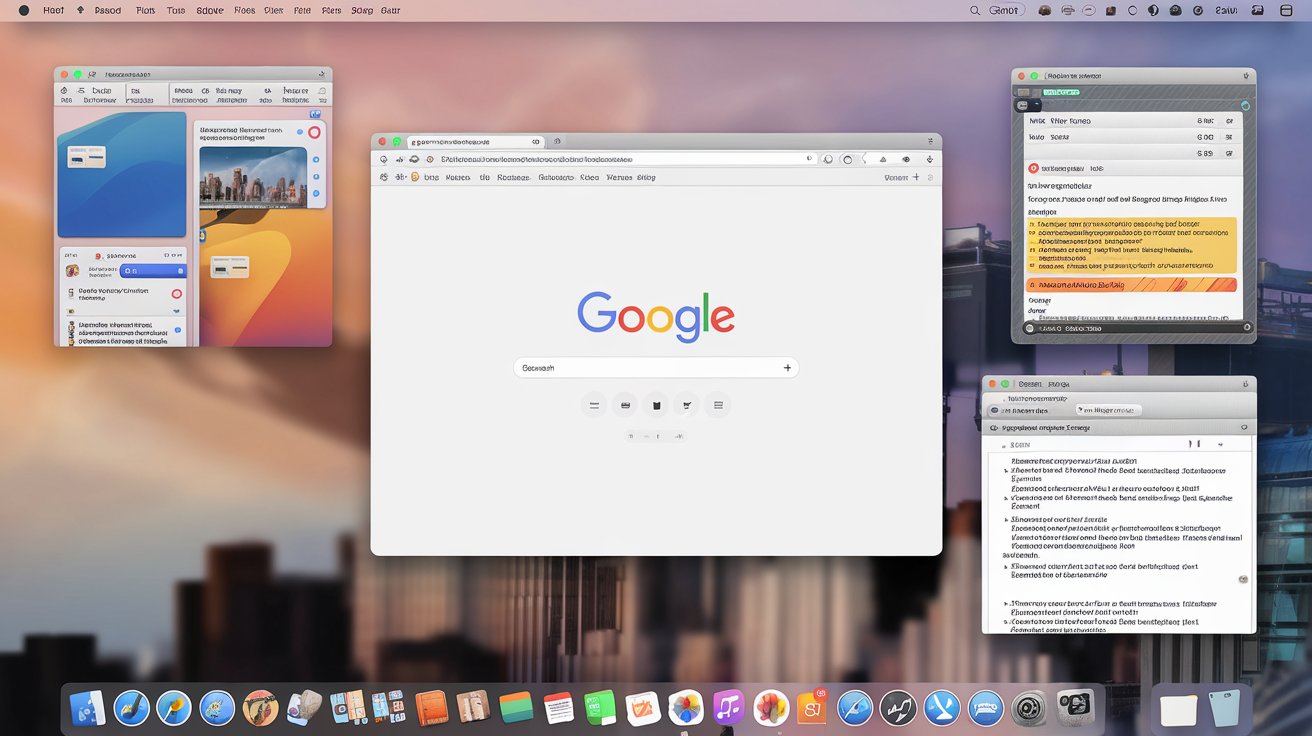
At times, your Mac screen can become cluttered with open browser tabs, running applications, and file windows. When icons are either too big or too small, locating files or apps can slow you down. Adjusting their size is more than just a visual preference—it plays a direct role in boosting clarity, reducing eye strain, and streamlining your work routine, no matter where you are—be it São Paulo, Berlin, or Singapore.

Quick Overview: • Learn how to resize icons in Finder, Dock, and Launchpad. • Discover how professionals worldwide use these settings to stay efficient. • Get actionable tips for keeping your workspace clean and your screen comfortable.

Why Icon Size Matters More Than You Think

Consider a graphic designer using a 4K monitor in Berlin. Larger icons help them browse image assets without squinting. In contrast, a software developer in Nairobi may prefer smaller icons to make room for more tools in their Dock. Each use case is unique, but the need for visual clarity and smoother navigation is shared by all.

For individuals relying on assistive features, icon size is especially critical. A teacher in Stockholm managing course materials may have visual limitations. By enlarging icons, they maintain their independence and avoid needing extra zoom support.

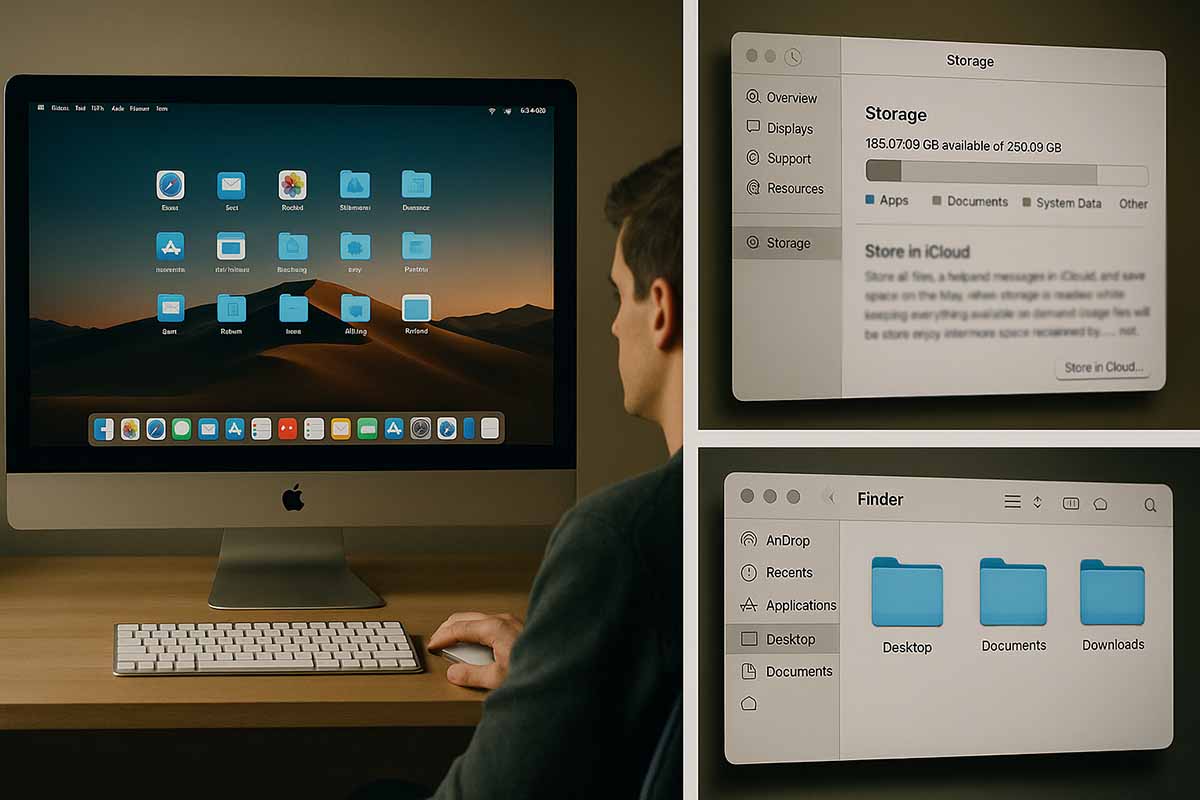
Steps to Adjust Icon Size in Finder

Finder is the control center for managing files in macOS. Here’s how to tailor the icon size to your needs:

Launch Finder and select the folder you want to organize.

Press +J or choose View ▶︎ Show View Options.

Move the “Icon Size” slider until it feels right for you.

Select “Use as Defaults” to apply this configuration across similar folders.

Teams working with design elements—like a marketing unit in Toronto—often depend on this feature. When reviewing multiple logo drafts or mockups, seeing clearer icon previews helps them catch small details that matter.

How to Resize Icons in the Dock

The Dock offers quick access to frequently used applications. For many professionals—from Nashville sound engineers to Tokyo-based coders—this is the first place they interact with when starting their day.

To adjust Dock icon size:

Open System Settings ▶︎ Desktop & Dock.

Look for the “Size” section.

Move the slider to the left for smaller icons, or right for larger ones.

You can also toggle “Magnification,” which makes icons expand when your cursor hovers over them. This feature is handy for those using compact workspaces, as it saves space without compromising visibility.

Fine-Tuning Icons in Launchpad

Launchpad offers a grid-based view of your installed apps. To modify icon size within it:

Trigger Launchpad using a four-finger pinch or the F4 key.

Use +- to shrink icons or += to enlarge them.

Repeat until you find the most comfortable arrangement.

This quick adjustment can make a difference in offices where app use is intensive. For example, at a media agency in Sydney, editors switch between design, communication, and editing apps all day. By scaling icons just right, they save time and stay visually organized.

Simple Tools to Maintain Icon Consistency

You don’t have to adjust each view manually every time. Here are a few methods that streamline icon control across your workspace:

Right-click + Two-Finger Drag: On the desktop, hold the right-click while sliding two fingers on your trackpad to zoom icons without accessing menus.
Smart Folders: Create these to group files by rules. Once created, you can apply uniform icon settings to the entire folder.
Stacks: Available in modern macOS versions, Stacks automatically group desktop items by type, keeping things tidy and easy to adjust.
Automator Workflows: Use Automator to create a task that sets icon sizes automatically in specific folders you clean or review regularly.

How Icon Sizing Supports Work Around the World

Remote Teams
In collaborative settings—like software teams in New York or digital agencies in Helsinki—aligning icon sizes ensures screen-sharing is more effective. When everyone’s layout looks the same, step-by-step instructions become easier to follow.

Creative Professionals
Photographers in Vancouver often browse large collections of RAW files. With larger icons, they preview shots without opening each one. Game developers in Kraków also benefit, using bigger icons to catch pixel-level details in assets.

Finance and Analysis
Traders and analysts in cities like Chicago or London who work with dashboards and spreadsheets prefer different sizes depending on their task. They often enlarge icons on their main screen for quick access while keeping others small to monitor multiple panels at once.

Comfort and Health
Ergonomics includes visual comfort. A software tester in Wellington, sensitive to brightness, finds dark mode soothing when paired with appropriately sized icons. It reduces eye strain, especially during long QA sessions involving white-background folders.

Organizing Your Mac Desktop With Efficiency

Icon resizing helps, but too many files on the desktop can cause visual overload. Here’s how to keep things manageable:

Use colored tags in Finder. Even with smaller icons, tags help identify file categories instantly.

Enable sorting by “Date Modified” so the most recent work stays at the top of your view.

At week’s end, move old files to an archive folder or external drive. This keeps your primary workspace light and distraction-free.

Tips for Users with Multi-Monitor Setups

Those using more than one display—like a developer in San Francisco or a designer in Seoul—may want different setups per screen. Although macOS doesn’t support independent Dock or Finder icon sizes for each monitor, there’s a workaround.

Spaces and Mission Control allow you to treat each monitor as a separate workspace. You can tailor the layout in each, optimizing visibility and performance. While it’s not as granular as per-screen icon control, it helps create a tailored experience.

Frequently Asked Questions

Can icon size be different per folder?
Yes. Icon sizes can be changed for each folder individually via Finder’s View Options panel. For consistent settings, apply the “Use as Defaults” button to folders with matching view styles.

Does resizing icons affect performance?
Slightly. Higher magnification and animations may increase rendering time, especially on older machines. You can go to Accessibility ▶︎ Display and activate “Reduce motion” for smoother handling.

Are there shortcuts for Dock resizing?
macOS doesn’t include built-in shortcuts for this, but third-party apps such as Hammerspoon let you script and automate those changes.

Improving Your Day-to-Day Workflow

Adjusting your Mac’s icon size isn’t about perfection—it’s about comfort. Whether you’re a freelancer managing creative files or an analyst working through large reports, a clean and tailored workspace reduces friction. When icons are just the right size, you waste less time clicking around or searching visually.

A thoughtfully arranged screen promotes faster decision-making and allows you to remain focused longer. It also reflects your working style, encouraging a rhythm that feels natural and less forced.

Clear Visuals Lead to Better Focus

Icon adjustments might appear minor, but their impact grows over time. From smoother file access to less eye strain, every tweak counts. Try out the recommendations above, and you’ll notice a difference not just in how your desktop looks—but how your entire workflow feels.

Setting Up Multiple Desktops on Mac

Setting Up Multiple Desktops on Mac

Managing Multiple Desktops on a Mac

Many Mac users across the globe face the same issue: juggling several projects on one screen often leads to clutter and confusion. From video editors working with timelines and preview panels to professionals handling email and analytics dashboards, a single space quickly gets overcrowded. Multiple desktops offer a straightforward way to bring back structure and calm to your digital workspace.

With this setup, it becomes easier to keep track of where each app or document is located. You can assign tasks to specific desktops and reduce the chance of losing focus when switching between activities. Whether you’re writing a report, doing research, or simply trying to keep your workflow neat, this feature can make a big difference.

Why Multiple Desktops Matter

All over the world, this feature has helped boost productivity. For instance, a video editor in Berlin uses separate desktops for editing timelines, preview panels, and asset folders. In New York, a writer sets aside one desktop for research and another for drafting articles. By keeping their tools and content organized, they stay in the zone longer and work more efficiently.

It also minimizes distractions. If you focus on a desktop used solely for work, alerts from messaging apps or social media tabs won’t pop up unless you switch to a different one. Time isn’t wasted hunting for hidden windows, and more energy goes into actual tasks.

Creating a New Desktop

To get started, open Mission Control. Press <kbd>Control</kbd> + <kbd>Up Arrow</kbd> or swipe up with three fingers on your trackpad.

A bar will appear at the top of your screen showing “Desktop 1.” On the right, click the plus sign (+) to create additional spaces like “Desktop 2” or “Desktop 3.”

While macOS doesn’t offer built-in desktop naming, you can try third-party tools like “TotalSpaces” to label each one.

Be strategic about how many desktops you create. Too many can become confusing. Most users find that three is enough: one for main tasks, another for communication tools like email and chat, and a third for personal browsing or social media.

Moving Apps and Windows Between Desktops

Once you have more than one desktop, you’ll need to learn how to move windows around. Here’s how:

Using Mission Control: Open it again, drag the app window from its current desktop to another one in the bar above.

Using Keyboard Shortcuts: Press <kbd>Control</kbd> + <kbd>Right Arrow</kbd> or <kbd>Left Arrow</kbd> to switch spaces. Then, drag the app window to the side of your screen and continue swiping to transfer it.

Handling Full-Screen Apps: Each full-screen app automatically becomes its own desktop. You can resize the app window and move it back into another space if needed.

A content strategist in Tokyo shared that they first found the feature confusing. But after a few days of using it regularly, they became fluent in switching and organizing windows. Now, it’s part of their daily routine.

Pros and Drawbacks

Organizing your digital workspace with multiple desktops comes with both benefits and challenges.

Advantages

  • A cleaner screen setup
  • Fewer distractions
  • Stronger focus on each task
  • Easier to manage multiple apps

Drawbacks

  • Requires learning a few shortcuts
  • You may forget where certain windows are
  • Too many desktops can create clutter if unmanaged

In many companies abroad, there’s a popular habit called the “desktop clean-up.” Every weekend, they go through their spaces, remove unused ones, and prepare for the week ahead.

How to Manage Desktops Effectively

For smoother use over the long term, teams in places like London and San Francisco follow these smart strategies:

Assign a Source Desktop

Start with one default space for daily responsibilities. Email, calendars, and other time-based tools belong here. It becomes your anchor desktop.

Group by Purpose

Try a theme-based layout. You can have one desktop for research, another for editing, and a third for tools like Slack or Teams. That way, your screen environment aligns with your workflow.

Use Bookmarks for Speed

If you frequently visit the same web apps, keep them bookmarked in the browser you use on one desktop. This lets you get to what you need faster, without extra searching.

Review Usage Monthly

At the end of each month, take a few minutes to check how many desktops you’re actively using. Remove any that are unnecessary. This avoids digital clutter and keeps your setup light and responsive.

A software engineer in Berlin mentioned that doing this helped them reduce mistakes when multitasking. It also improved how they prioritize work throughout the day.

Personalizing the Experience

While these methods offer structure, you don’t need to follow every tip exactly. The best approach is one that feels right for you. Some users prefer two desktops, others thrive with five or more. Your comfort should guide the setup.

Start small. Experiment with adding and deleting desktops based on your tasks. You’ll discover over time which layout helps you feel most productive.

Common Use Cases Across Different Fields

Let’s take a look at how people in various roles use multiple desktops to their advantage:

Graphic Designers: One desktop for layout software, another for reference images, and a third for client communication.

Writers: A space for drafting, one for research, and one for outline tools or editing apps.

Analysts: Separate desktops for data dashboards, spreadsheets, and presentations.

This structure gives users control over their flow. You can easily move between focused work and collaboration without mixing everything into one chaotic screen.

How to Avoid Mistakes When Managing Desktops

Even with a clear structure, there are a few things to keep in mind to avoid frustration:

Don’t overload your spaces: Resist the urge to create a desktop for every minor task. Stick to major categories only.

Label mentally if not visually: Since macOS doesn’t allow renaming desktops by default, use sticky notes or simple reminders to help keep track.

Take breaks and reassess: If you feel that switching around has become tiring, it might be time to remove or combine spaces.

Shortcuts can also help speed things up. Practice the key combinations every day until it becomes second nature.

Remote Work and Desktops

As more people work from home, maintaining a clear screen layout becomes even more valuable. Shared tools, multiple Zoom calls, and browser-based dashboards can clutter your view.

Some users set aside one desktop solely for video conferencing. That way, it doesn’t interfere with the rest of their workflow. Others use desktops to separate personal browsing from official work tools, making it easier to “sign off” when the day ends.

Digital boundaries can help reinforce real-world ones, improving focus and reducing burnout.

Using multiple desktops on a Mac may seem like a small step, but it can bring a big shift in how you approach work. Once set up, your digital space feels calmer, your tasks feel more organized, and your day flows more smoothly.

Try applying each strategy one by one—from creating your first new desktop to cleaning up unused ones. You’ll start noticing the difference in your daily rhythm.

What matters most is that the setup works for you. You don’t need to apply every method. Just pick the ones that match your style. Your next desktop arrangement could be the key to unlocking a more focused, balanced, and productive workday.

Personalizing Menu Bar on Mac

Personalizing Menu Bar on Mac

Personalizing Your Mac’s Menu Bar: A Step Towards Customizing Your Workflow

For many Mac users, the menu bar is more than just a visual element—it’s the command center for their daily tasks. Whether you’re a professional content creator, a social media enthusiast, or someone who simply values efficiency, personalizing your menu bar can make a significant difference in how you interact with your Mac. From the ability to add shortcuts for your most-used apps to adjusting system settings at your fingertips, a customized menu bar can streamline your workflow and improve your overall Mac experience.

Quick Overview of Personalizing the Menu Bar

When you start adjusting your menu bar, the options are extensive. You can:

  • Rearrange your menu items to prioritize your most-used tools.
  • Add or remove apps from the menu bar for quick access.
  • Modify icons for better clarity and personalization.
  • Enable system preferences for a more personalized experience.

This article will walk you through the steps to personalize the menu bar, explore the benefits of doing so, and provide examples of useful menu bar tweaks.

Why Personalizing Your Menu Bar is Worth Your Time

The menu bar serves as a hub for numerous functions on your Mac. Personalizing it ensures that you don’t have to dig through menus or launch apps from the Dock repeatedly. Instead, you can focus on tasks that matter most. Here’s a closer look at why these customizations are not just a cosmetic upgrade but a productivity booster.

Prioritize What Matters Most

One of the first steps in personalizing your menu bar is deciding what apps and tools you need immediate access to. By arranging these elements, you ensure that everything you require is always just a click away. For instance, if you frequently use apps like Mail or Calendar, placing them in the menu bar will reduce the time spent navigating through the MacOS interface.

A good rule of thumb is to place the tools that you access throughout the day in the top row of your menu bar, where they’re easy to reach. This arrangement is perfect for users who want to minimize distractions while maximizing efficiency.

Add Custom Icons for Clarity

Another fantastic way to personalize your menu bar is by changing or adding custom icons. The default icons for system functions like Wi-Fi or Bluetooth can sometimes get lost in the shuffle, especially if you have many apps in your menu bar. By choosing icons that are more meaningful or visually distinct, you make it easier to identify what each button does, saving precious time when you need to access a specific function.

You can also tweak the appearance of app icons with third-party applications. Some tools allow you to create icons with your own branding, adding an additional level of personalization to your Mac setup.

Clean Up by Removing Unused Items

Just as adding useful tools to the menu bar can improve your workflow, removing unnecessary ones can create a cleaner, less cluttered workspace. Over time, your menu bar may accumulate icons from apps that you no longer use. Fortunately, you can remove these items in just a few steps. This not only clears up space but also declutters the interface, allowing you to focus on what’s truly important.

Using Third-Party Tools for Advanced Customizations

For users who want even more control over their menu bar, third-party apps are a great option. Tools like Bartender allow you to hide, rearrange, and organize your menu bar items in ways that go beyond the default MacOS options. With such apps, you can group similar tools together, make certain items hidden until needed, and tweak the way icons behave when clicked.

Accessibility and Quick Adjustments

Personalizing the menu bar also has the added benefit of improving accessibility. By adding the tools you use most, you reduce the need to navigate to different sections of your system, making it faster and easier to access various functions. For people with disabilities or those who require extra assistance, these small adjustments can make a significant difference in everyday interactions with a Mac.

Step-by-Step Guide to Personalizing the Menu Bar

If you’re ready to dive into customizing your Mac’s menu bar, here’s a simple step-by-step guide to get started:

1. Rearrange Menu Bar Items

Rearranging the items in your menu bar is simple. Just hold down the Command key and drag the icons to the desired location. This works for most apps and system functions. You can place the most important items closer to the center for easy access.

2. Add or Remove Items

To add new items to the menu bar, go to the System Preferences section on your Mac. Under the Menu Bar settings, you can enable or disable various icons like Wi-Fi, Bluetooth, or Time Machine. Apps like Dropbox or Google Drive can also add their icons to the menu bar automatically when they’re installed.

If you want to remove an item, hold the Command key and click the icon. This will reveal the option to remove or hide the item.

3. Use Third-Party Apps

As mentioned earlier, there are several third-party applications that can extend your menu bar’s functionality. Bartender, for example, offers a powerful set of tools for managing your icons. You can hide items you rarely use, organize them into groups, or make them visible only when clicked.

4. Customize Icons

Some apps allow you to change their icons directly within the app’s settings. For others, you may need to use a third-party tool to replace default icons with custom ones. Apps like LiteIcon let you replace system icons with your own.

5. Adjust System Preferences

For more advanced customizations, you can access System Preferences and make additional tweaks under the Dock & Menu Bar settings. This will let you adjust the appearance of certain icons and enable features like Do Not Disturb or Battery status.

Tools to Help You Personalize the Menu Bar

While many MacOS settings can help you adjust the menu bar to your liking, the addition of third-party tools can unlock even more possibilities. Below are some apps that can assist you in making your menu bar truly yours.

Bartender

Bartender is one of the most popular tools for organizing menu bar items. With Bartender, you can hide, rearrange, or manage your icons in more ways than MacOS allows by default. The app allows you to keep your menu bar neat and organized without losing access to essential tools.

iStat Menus

For users who need detailed system information at their fingertips, iStat Menus is a perfect addition. It provides real-time data about your CPU usage, memory, network activity, and more—right in your menu bar.

ToothFairy

ToothFairy is another app that simplifies your Bluetooth connections. It allows you to quickly toggle Bluetooth devices like headphones or speakers from the menu bar, making it easier to switch between devices without navigating through settings.

Vanilla

If you’re looking for a lightweight tool to hide unnecessary icons, Vanilla might be just what you need. It’s an easy-to-use app that gives you the ability to group and hide menu bar icons, helping you declutter without making any major changes to your setup.

A Seamless Mac Experience Awaits

By personalizing your menu bar, you can transform how you interact with your Mac every day. These small tweaks not only make your workspace cleaner but also provide a more streamlined, efficient experience. Whether you’re looking to improve productivity, enhance accessibility, or just enjoy a more personalized environment, customizing your menu bar is a step in the right direction. Take the time to adjust your settings, remove unnecessary icons, and experiment with third-party apps. In the end, these adjustments can make a big impact on your overall Mac experience.

Customizing Dock Settings on Mac

Customizing Dock Settings on Mac

Customizing Mac Dock Settings: A Smoother Workflow

Mac users look for ways to make their daily tasks more comfortable and efficient. Whether you work on editing photos for an international project, finishing a presentation for a client abroad, or joining online classes, even small details like the look and location of your Dock can change how you work. Adjusting your Dock settings can help you tailor your workspace to suit your personal needs and style.

Setting the Dock’s Location

Many users find that the position of the Dock affects how quickly they can access their tools. Some prefer the Dock at the bottom of the screen because it is a familiar location. Others feel more comfortable when it is on the left or right side of the display.

To change the Dock’s location, follow these steps:

  1. Open the System Settings (or System Preferences if you use an older version of macOS).
  2. Find the section labeled Dock & Menu Bar.
  3. Look for the option labeled Position on screen and choose your desired setting: left, bottom, or right.

For instance, if you are a freelancer receiving varied projects from different parts of the world, fast access to your favorite tools is very handy. Choosing a location that makes your tools easier to reach can improve your workflow. Experiment with placing the Dock at the side or bottom and observe which position helps you work faster and with less strain on your eyes. Adjustments like these can create a work environment that feels more personal and efficient.

Think about the size of your screen. If you have a smaller display, moving the Dock to a side may free up more space. On a larger monitor, keeping the Dock at the bottom might let you see more of your work at a glance. Testing different placements for at least a week may reveal which layout best fits your daily tasks.

Adjusting Size and Magnification

The size of the Dock and its magnification effect are important factors in how you interact with your computer. Changing these settings can influence how clear and accessible your icons appear.

To adjust these settings:

  • Open System Settings and navigate to Dock & Menu Bar.
  • Find the Size slider and move it until the Dock reaches the size that feels comfortable.
  • Locate the Magnification slider. When you enable this feature, the icons near your mouse pointer become larger, making them easier to distinguish.

This is very useful for those handling multiple apps simultaneously. Large icons can help prevent mistakes when selecting the right app, especially during busy periods when you need to switch tasks quickly. Users working on tasks such as video editing or document processing may choose to turn off magnification for a cleaner view. However, if you rely on seeing clear icons, the magnification setting might be a useful aid.

Consider your own work style as well as that of people who share your computer. Some may appreciate larger icons, while others might prefer a minimalist approach. Try both ways to see what suits your needs best. A friend once shared that after switching the setting for a week, they felt more organized and less rushed while working on creative projects.

Adding Applications and Folders to the Dock

A key feature of the Dock is the ability to store your favorite applications and folders for quick access. This makes it simpler to jump into your work without having to search through multiple menus.

To add items:

  • Open the Finder.
  • Locate the desired app or folder.
  • Drag it to the Dock. Apps usually go on the left side, while folders are best placed on the right near the Trash.

For those working on projects across different time zones, having immediate access to important files can save valuable time. For example, if you frequently use a specific folder for project documents, adding it to your Dock allows you to open it with just a click. If you ever find that the Dock has too many items, you can easily remove unnecessary icons by right-clicking (or holding the Control key and clicking) and selecting the removal option.

Another helpful feature is the option to add a Stack. This creates a small grid or list from a folder containing daily documents or reference files. When you click the Stack, you can see and select a file without switching to another window. This function is particularly useful for users who deal with multiple file formats such as PDFs or images during busy work sessions.

Organizing Minimized Windows

Managing open windows is another key part of making the Dock work for you. The Dock settings offer options for how windows should minimize. There are two styles to consider:

  • Genie effect: This style shows the window sliding into the Dock with a unique animation.
  • Scale effect: Here, the window shrinks in size until it disappears into the Dock, offering a simpler look.

Some users say that the Genie effect provides a pleasant animation that adds charm to the work area. Others prefer the Scale effect because its simplicity helps them keep track of their tasks without extra distractions. The choice depends on how you want your computer to feel as you move from one task to another.

When many windows are open, keeping track of them can become challenging. Adjusting the size and animation of these windows can help keep your workspace orderly. One suggestion is to combine a smaller Dock size with the Scale effect, so you can quickly see all icons without a clutter of animations. This can be especially helpful during long online meetings when several documents and apps are open at once.

Practical Tips for a Better Dock

Many Mac users develop their own methods for organizing the Dock. Here are a few tips that might work for you:

  • Keep Only What You Use: Remove apps that you seldom use by dragging them out of the Dock.
  • Organize by Task: Group related apps or files into a folder and add it to the Dock for faster access.
  • Try Auto-Hide: Activate auto-hide to maximize screen space. The Dock will only appear when needed.
  • Select Your Preferred Animation: Choose the animation style that best fits your work rhythm.

Taking these steps can help you create an efficient desktop area. For instance, if you collaborate with people in different regions, having only the most needed shortcuts visible can prevent distractions. One user mentioned that by keeping the Dock tidy, they felt less overwhelmed when switching between various work tasks.

Personalizing Your Dock for Everyday Use

The beauty of the Dock is its flexibility. Changes you make today are not permanent, and you can adjust the settings as your work needs evolve. You might start by placing the Dock at the side of your screen during a period of high multitasking and later move it to the bottom when focusing on creative tasks.

Imagine you are preparing for a large video conference that involves screen sharing several documents and applications. By setting up your Dock to display only crucial items, you can ensure that everything is ready to go when needed. A friend once commented that a simple change in the Dock’s layout helped reduce the stress of switching between programs during important meetings.

Every little choice in your settings contributes to how easily you manage daily tasks. For those who work internationally or handle tasks for different projects, taking the time to fine-tune your Dock can lead to smoother transitions between activities. It is not only about aesthetics but also about finding the most comfortable and effective way to work on your Mac.

Adjusting for Different Workflows

Your work style, and that of your coworkers or family members, can influence how you set up the Dock. Here are a few points to consider when making adjustments:

Consider Your Daily Routine

  • Think about the apps you use in the morning and those used later in the day.
  • Identify folders you open frequently for work or study.
  • Adjust the settings based on how often you switch between tasks.

Experiment with Settings

Testing different positions and sizes over a few days can reveal what setup best suits your needs. Try changing one setting at a time to see how each change affects your productivity.

Share Your Ideas

If you share your computer with others, have a conversation about what works best for everyone. You might find that a shared setup leads to better teamwork and fewer interruptions when switching users.

Learn from Others

Sometimes learning about how others adjust their Dock can give you ideas for your own setup. Read online forums, ask friends, or watch short tutorials on customizing Mac settings. Such practical advice can provide new ways to improve your workflow.

A Final Note

Making small changes to your Mac Dock settings can have a big impact on your day-to-day tasks. This guide has provided simple steps to adjust the Dock’s position, size, magnification, and management of minimized windows. The goal is to help you create a workspace that feels natural and supports your work efficiently.

By testing and adjusting your settings, you will soon notice the difference in how you manage work tasks. Take your time to personalize each aspect of your Dock, and let the changes guide you toward a smoother and more comfortable workflow. Enjoy the process of making your workspace uniquely yours.

Changing Desktop Backgrounds on Mac

Changing Desktop Backgrounds on Mac

Changing Your Desktop Background on Mac: A Simple Guide with Everyday Impact

If you spend hours on your Mac—whether for work, school, or relaxing—it’s natural to want your screen to reflect a bit of your personality. Your desktop background isn’t just a decorative feature. It can shape your mood, boost your focus, and even serve as a little reminder of things you care about. From digital artists to teachers running online classes, people across the world use their Mac desktops not only to stay productive but also to feel connected and inspired.

Changing your desktop wallpaper might seem like a small thing, but it plays a bigger role in how you interact with your computer. The process is simple, and the results can be surprisingly refreshing.

Why Your Desktop Background Matters

Everyone has their reasons for customizing their desktop. Some choose calming landscapes to ease the stress of a busy day, while others go for bold artwork to fire up their creativity. A photo of the mountains can create a sense of peace. An abstract design from a favorite artist might encourage you to think outside the box. These little touches can give your workspace more energy or serenity—depending on what you need.

macOS offers several options for adjusting your wallpaper. Whether you’re using System Preferences or the newer System Settings layout, it’s easy to explore what’s available. Built-in images, personal albums, or even dynamic wallpapers that shift with the time of day are just a few taps away.

How to Change Your Desktop Background

Switching things up is easier than you might think. Here’s a quick way to do it:

  1. Go to System Settings (or System Preferences, depending on your macOS version)
  2. Click Desktop & Screen Saver
  3. Choose from Apple’s built-in images or select from your own photo albums

You can also fine-tune the way your image displays—whether it’s centered, stretched, or fills the screen. And if you prefer a subtle look, a solid color might suit you better.

One List to Keep in Mind

Here are three things to check when setting up your wallpaper:

  • Image Source: Use Apple’s default gallery or select from your own photo collection
  • Layout Settings: Adjust how the image fits your screen (fill, fit, stretch, center)
  • Dynamic Options: Try wallpapers that shift with the time of day for added variety

These choices let you mix practicality with self-expression. Whether you want a neat, distraction-free look or something more expressive, there’s an option that fits your style.

Real Stories from Around the World

One designer in Europe changes his desktop background based on his current project. For technical tasks, he sticks to minimal geometric designs. But when he’s working on something more artistic, he switches to colorful, energizing themes. He says it helps him stay focused and inspired.

In Asia, a teacher running online classes prefers pastel backgrounds. They’re easier on the eyes and don’t distract from her students. When she’s feeling tired, she adds a photo of mountains as a gentle reminder of relaxing vacations.

These stories show that no matter your profession, the right desktop background can support your daily goals—whether that’s productivity, creativity, or a bit of calm.

Tips to Make It Work Well

Using a high-resolution image helps your background look sharp and clear. For Macs with Retina display, try using large, high-quality images. Some people want to use Live Photos or animated backgrounds, but macOS doesn’t always support these directly. In that case, third-party apps might offer more options—but be sure they’re safe and reliable.

For simpler methods, right-clicking on a photo and selecting “Set as Desktop Picture” is another quick trick. You can preview how it will look, too, which helps avoid awkward cropping or stretched images.

Wallpaper Preferences in Different Cultures

In various regions, users express their identity through desktop design. Traditional art and calligraphy are common in parts of Asia, while minimalist themes or cityscapes are popular in Western countries. Some go for spiritual symbols or images that align with special events like holidays and festivals. These choices often carry meaning that reflects the user’s background or current mood.

Choosing Images That Are Easy on the Eyes

If you’re working long hours, the right background can reduce eye strain. Bright or overly detailed images may be tiring after a while. Soft colors or pastel tones can help your eyes relax. For nighttime users, darker themes are often more comfortable and can help with focus.

Still, everyone’s different—feel free to test what works best for you.

Boosting Organization and Focus

Some Mac users choose backgrounds that help them stay on track. These might include gentle grid lines, motivational phrases, or personal photo collages. These little touches can help you remember your goals or stay calm during a packed schedule.

Also, keep in mind whether others might see your screen—especially during video calls or shared presentations. Some users schedule automatic background changes every few hours to keep things feeling fresh.

Get Creative with Layouts

Playing with how an image is framed can make a big difference. A centered photo with a neutral border can look neat and artistic. Online forums and Mac user groups often showcase creative setups. You’ll find screenshots with creative icon placement, subtle widgets, and personalized themes.

Whether you prefer simplicity or bold designs, these communities are a great source of inspiration.

Ideas for What to Use

Here are some easy themes that many users enjoy:

Minimal Patterns: Perfect for clean, organized setups

Nature Scenes: Mountains, oceans, and forests bring calm

Abstract Designs: Bright and expressive for creative energy

Solid Colors: Simple and distraction-free

You don’t need a big collection—just one image that speaks to you can make a difference.

How It Affects Productivity

A well-chosen wallpaper can help keep your attention where it matters. Clean designs make it easier to find icons. But for creative work, a visual boost—like a personal photo or a quote—can spark motivation. The key is balance. Too much detail may clutter your view, but a flat, dull image might not lift your energy either.

Those working in visual fields like design or content creation sometimes use collage-style desktops as mood boards. These visuals guide their process and add focus.

If Something Doesn’t Work

Occasionally, wallpapers might not display as expected. Here’s what to check:

Make sure the image is in a supported format like JPG or PNG

Confirm that the file has the correct permissions

If the problem persists, restart your Mac or check for software updates

Most wallpaper-related issues are minor and easily solved with a little troubleshooting.

Adding a Personal Touch

Some people treat their desktop like a tiny art gallery. Gamers use screenshots from their favorite titles. Photographers update theirs with recent work. Others create quote boards for daily inspiration. These small acts turn the desktop into a story of who you are and what drives you.

Sharing Your Setup

Communities centered around desktop setups are thriving. People share screenshots, give feedback, and recommend useful tools. You might find users with similar interests or learn a new trick for optimizing your workspace.

Keep an Eye on macOS Versions

The interface for changing wallpapers varies slightly depending on your macOS version. Newer updates often include easier navigation and extra features like iCloud integration. If you’re unsure where to find settings, use the search bar at the top of System Preferences to type “desktop.”

If your Mac supports it, you might consider updating to gain access to the latest features.

Reflections on Personality and Design

For some people, desktop images reflect mood and intention. A cheerful background might help maintain a positive attitude, while a calm one can ease stress. Even during meetings, your wallpaper can be a conversation starter. Others use their desktop as a quiet reminder of their goals, choosing visuals that keep them on track.

Athletes and artists have long used visual cues to focus—and your desktop can do the same.

Sources of Free Wallpapers

There are plenty of free sites with beautiful, high-resolution wallpapers. Some artists even share their work openly. If you know someone who creates designs, consider asking them for something special. You could end up with a one-of-a-kind background that perfectly fits your vibe.

As technology evolves, even more options may appear in the future—but for now, you already have everything you need to personalize your Mac.

Be Practical and Thoughtful

If you’re spending a lot of time on your Mac, think about what type of image helps you feel at ease. It shouldn’t hide your icons or distract from your tasks. Some companies require standard wallpapers for meetings, but others let you customize freely. Just choose something that fits your role and respects shared spaces.

A Small Change That Can Make a Big Difference

Finding the right desktop background isn’t just about looks. It helps shape how you feel while working, how others see your space, and how you connect with what matters to you. Over time, you may not even notice it’s there—but its impact stays with you: more comfort, more focus, and a touch of joy in your everyday routine.

Organize Your Mac for a Clutter-Free Desktop

Create a Clean and Efficient Mac Workspace

A well-organized Mac enhances productivity, reduces distractions, and improves system performance. Cluttered desktops can lead to slower search times, difficulty locating files, and unnecessary storage consumption. When your Mac is neat and structured, you can work more efficiently, navigate seamlessly, and maintain an aesthetically pleasing workspace.

Disorganization doesn’t just affect your workflow; it can also impact your Mac’s speed and responsiveness. Excessive files on the desktop can slow down performance, while poorly managed folders can make it harder to retrieve important documents. Whether you’re a professional looking to optimize efficiency or someone who enjoys a clean digital environment, organizing your Mac is a worthwhile investment.

In this guide, we will explore step-by-step methods to declutter your desktop, structure your files, optimize storage, and maintain a seamless workflow. As you refine your Mac’s layout, you can also explore unique themes to match your personalized workspace.

Decluttering Your Desktop

Using Stacks to Keep Files Organized

macOS provides a built-in feature called Stacks, designed to automatically group similar files on your desktop. Stacks categorize files by type, date, or tag, making it easier to find what you need without cluttering your screen. To enable Stacks, right-click on the desktop and select Use Stacks. Once activated, macOS will neatly group files, preventing unnecessary visual clutter.

For greater efficiency, customize Stacks by right-clicking the desktop and selecting Group Stacks By. Choosing options such as Date Last Opened or Tags can help create a more intuitive file organization system that suits your workflow.

Additionally, Stacks can be expanded and collapsed with a simple click, allowing you to access files quickly while keeping the desktop visually tidy. If you regularly work with a large number of documents, combining Stacks with Finder’s search and tagging features can further improve efficiency, ensuring that important files remain accessible without cluttering your screen.

Creating Custom Folders for Better File Management

A structured folder system helps keep files accessible and prevents the need for constant desktop cleanups. To create custom folders, open Finder, navigate to your preferred location, and select File > New Folder. Label your folders based on categories such as Work, Personal, Projects, or Downloads to keep related files together.

For further efficiency, apply color tags to folders by right-clicking on them and selecting a color under Tags. These visual indicators help distinguish different file types at a glance, improving your overall workflow.

Additionally, using nested subfolders within primary categories can help keep files even more structured. For example, within a Projects folder, you can create subfolders named by client or project type, allowing for easier access and better organization. Regularly reviewing and consolidating folders prevents unnecessary duplication and ensures a streamlined file system.

Hiding or Removing Unnecessary Desktop Items

Minimalism can significantly enhance focus and organization. If you prefer a clean look, you can hide icons from your desktop by accessing Finder Preferences > General and unchecking unnecessary items such as external drives, hard disks, or connected servers.

For users who want to temporarily remove desktop clutter, a quick Terminal command can hide all desktop icons:

defaults write com.apple.finder CreateDesktop -bool false; killall Finder

To restore icons, change false to true and re-run the command.

Another effective method to maintain a clean desktop is by utilizing Hot Corners, which allow users to quickly access Mission Control, show the desktop, or open specific apps with a simple mouse movement. Configuring Hot Corners in System Settings > Desktop & Dock > Hot Corners provides an intuitive way to toggle between workspaces without leaving unnecessary items visible on the desktop.

Managing Files Efficiently

Using Smart Folders to Automate Organization

Smart Folders in Finder help automate file organization by displaying files based on specific criteria without physically moving them. To create a Smart Folder, open Finder, select File > New Smart Folder, and set filters such as file type, date modified, or tags. This ensures that documents remain organized and easily searchable without manual sorting.

Additionally, Smart Folders continuously update in real time based on the applied filters, ensuring that newly created or downloaded files are automatically categorized. This feature is particularly useful for managing work-related files, frequently accessed documents, or media collections without having to manually relocate them each time.

Mastering the Downloads Folder

The Downloads folder is often the most cluttered area on a Mac. Over time, unused files pile up, consuming valuable storage. A simple way to keep this folder manageable is by setting up Automator workflows to sort and delete older files automatically.

To do this, open Automator, select Folder Action, choose the Downloads folder, and create rules that move specific file types into designated folders or delete files older than a set time period.

Implementing a Consistent Naming System

A structured naming convention makes file searching easier. Instead of using generic names like “Document1” or “Final_Version,” adopt a system that includes clear descriptors and dates, such as ProjectName_2024_Report.pdf. Standardizing file names helps prevent duplicate or misplaced documents and ensures that files are quickly accessible.

Additionally, incorporating prefixes or category-based identifiers can further enhance searchability. For instance, adding INV_ for invoices, MTG_ for meeting notes, or DRAFT_ for in-progress documents allows for easier categorization and retrieval. This approach helps users quickly identify file types without opening them, streamlining workflow and boosting efficiency.

Optimizing Storage and Disk Space

Using macOS Storage Management Tools

Apple provides built-in tools to manage storage effectively. To access these, navigate to System Settings > General > Storage. This panel provides insights into what’s consuming space and offers options to remove large, outdated, or unnecessary files. Deleting old backups, redundant downloads, and unused applications can help free up valuable storage.

Additionally, the Reduce Clutter feature in the storage settings can scan and suggest files that haven’t been accessed in a long time, making it easier to identify what can be removed. Reviewing recommendations in this section regularly can help maintain an optimized storage system without manual effort.

Offloading Files to Cloud or External Storage

If your Mac’s storage is running low, consider offloading files to iCloud Drive, Google Drive, or an external SSD. Enabling Optimize Mac Storage in System Settings > Apple ID > iCloud allows macOS to automatically store rarely used files in the cloud while keeping frequently accessed items locally.

For users working with large media files or extensive archives, utilizing network-attached storage (NAS) can be an excellent option. NAS devices allow multiple users to store and access files wirelessly, reducing the burden on your Mac’s internal storage while providing seamless file sharing and backup solutions.

Emptying the Trash and Clearing Cache Files

Regularly emptying the Trash is crucial for maintaining storage efficiency. Additionally, clearing cache files from Finder > Library > Caches or using tools like CleanMyMac can free up system space and improve performance.

Another useful step is removing old system log files stored in /Library/Logs, as these can accumulate over time and take up unnecessary disk space. Checking for large, outdated log files and deleting them manually or using a cleanup tool can help optimize storage and keep the system running efficiently.

Organizing Your Dock and Menu Bar

Customizing the Dock for Efficiency

Arranging the Dock with frequently used apps while removing unnecessary ones improves workflow efficiency. Open System Settings > Dock & Menu Bar to adjust Dock size, enable auto-hide, and organize applications based on priority.

Organizing the Menu Bar with Third-Party Tools

An overloaded menu bar can be distracting. Apps like Bartender allow users to hide rarely used icons, keeping only essential shortcuts visible. This keeps the menu bar clean while maintaining accessibility to important functions.

Adding and Removing Widgets for Quick Access

Widgets provide at-a-glance information without cluttering the desktop. Open Notification Center > Edit Widgets to add useful widgets such as calendar, reminders, and system stats. Removing unnecessary widgets prevents information overload and keeps the interface clean.

Maintaining a Clutter-Free Mac

Setting Up Automations for File Management

Using Automator or Apple Shortcuts, users can schedule file cleanups or automate repetitive tasks. Setting up workflows for document sorting or email attachments ensures that files remain structured without manual intervention.

Regularly Cleaning Up Your Desktop

Developing a habit of reviewing and decluttering your Mac every few weeks prevents unnecessary buildup. Setting a monthly reminder to delete old files and archive completed projects can maintain a clean and efficient workspace.

Using Time Machine for Backup and File Organization

A well-structured backup system ensures that important files are never lost. Time Machine allows users to restore previous file versions and keep organized backups of their system. Setting up automatic backups helps maintain a structured archive without additional effort.

Keep Your Mac Clean and Efficient

By implementing these organization strategies, you can maintain a clutter-free and efficient Mac that enhances productivity. A clean desktop minimizes distractions, speeds up workflow, and keeps your files structured for easy access. Regular file maintenance, storage optimization, and automated workflows ensure that your Mac remains organized long-term. Taking the time to set up these systems will save you time in the future and keep your Mac running smoothly.

Customize Your Mac Desktop with Themes and Layouts

Customize Your Mac Desktop with Themes and Layouts

Personalize Your Mac for Aesthetic Appeal and Efficiency

Customizing your Mac desktop goes beyond just changing the wallpaper. It can enhance both aesthetics and productivity, making your Mac feel truly yours. A well-organized and visually appealing desktop can improve workflow, reduce distractions, and create a more enjoyable computing experience. From wallpapers and widgets to Dock configurations and third-party tools, macOS offers numerous ways to tailor the desktop to your style and needs.

This guide will cover various customization techniques, including themes, layouts, and organization strategies. Whether you prefer a minimalistic approach or a feature-rich interface, these tips will help you design a workspace that enhances both functionality and personal expression. If you want to maintain a clutter-free workspace, it’s essential to keep your desktop organized by implementing smart file management and layout customization techniques.

Choosing the Right Theme for Your Mac

Light vs. Dark Mode

macOS provides built-in support for Light and Dark Mode, allowing users to switch between different visual styles. To enable or toggle between these modes, go to System Settings > Appearance and choose either Light, Dark, or Auto mode (which adjusts based on the time of day).

Light Mode offers a bright, clean look that works well in daylight settings, while Dark Mode reduces eye strain in low-light environments and provides a sleek aesthetic. Selecting the right mode depends on your preferences and working conditions.

Additionally, macOS allows users to customize accent colors and highlight colors to better match their chosen theme. These settings, found in System Settings > Appearance, enable users to add a personal touch to system menus, buttons, and highlights, creating a more immersive and tailored desktop experience.

Customizing Wallpapers and Screensavers

Changing your Mac’s wallpaper is one of the easiest ways to personalize your desktop. macOS includes a range of high-quality wallpapers, including dynamic wallpapers that adjust based on the time of day. You can access these options in System Settings > Wallpaper and select from Apple’s library or upload your own images.

For users who prefer more variety, websites like Unsplash, Pexels, and WallpaperHub offer high-resolution wallpapers. Additionally, you can set a custom screensaver by navigating to System Settings > Screen Saver, selecting from built-in options, or using third-party apps like Aerial to display dynamic, high-quality visuals.

Another useful customization feature is setting up Wallpaper Rotation, which allows macOS to automatically cycle through different wallpapers at set intervals. This can be configured in System Settings > Wallpaper by selecting a folder of images and choosing a frequency for rotation. This feature keeps the desktop fresh and visually appealing without requiring manual changes.

Third-Party Apps for Theming

For those who want to take customization further, third-party apps like uBar, LiteIcon, and cDock allow for advanced theming. These tools enable deeper UI modifications, such as changing system icons, customizing Dock appearances, and modifying window styles. When installing these applications, ensure they are compatible with your macOS version to avoid performance issues.

Additionally, apps like Rectangle and Magnet can enhance window management, allowing users to create custom layouts by snapping windows into predefined sections. These tools improve multitasking by organizing open applications efficiently, making them a valuable addition to a customized Mac setup.

Organizing Your Desktop for a Clean Look

Using Stacks to Auto-Organize Files

A cluttered desktop can slow down productivity and make it harder to find files. macOS offers Stacks, a feature that automatically groups files based on file type, date, or tags.

To enable Stacks, right-click on the desktop and select Use Stacks. This keeps your desktop tidy by collapsing similar files into categorized groups, which can be expanded or collapsed as needed.

Additionally, users can customize Stacks further by grouping files based on specific tags or custom attributes. By renaming files with meaningful tags or using color-coded labels, users can create a more personalized and efficient organization system, making it easier to locate essential documents quickly.

Creating Custom Folders and Shortcuts

For additional organization, creating custom folders with color-coded labels can make it easier to access frequently used files. To assign colors to folders, right-click on a folder, select Get Info, and choose a color in the Tags section. Additionally, you can create aliases (shortcuts) for frequently accessed applications and files by right-clicking an item and selecting Make Alias, then dragging it to the desktop or Dock.

Another effective way to improve organization is by utilizing Smart Folders in Finder. Smart Folders automatically collect and display files based on specific search criteria, such as file type, tags, or creation date. By setting up Smart Folders for work documents, media files, or downloads, users can streamline their workflow and quickly access relevant files without manually sorting through folders.

Hiding or Removing Clutter

If you prefer a minimalist look, hiding desktop icons can create a cleaner workspace. This can be done using Finder Preferences by unchecking the option to show hard disks, external drives, and connected servers on the desktop. Advanced users can also use Terminal commands to hide all desktop icons temporarily:

defaults write com.apple.finder CreateDesktop -bool false; killall Finder

To restore the icons, simply change false to true in the command above.

Customizing the macOS Dock

Changing Dock Position and Size

The Dock is a central part of macOS and can be customized for better accessibility and aesthetics. You can move the Dock to different positions (bottom, left, or right) by navigating to System Settings > Dock & Menu Bar and selecting your preferred alignment. Additionally, adjusting Dock size and enabling magnification effects can improve usability.

Another useful customization is enabling Minimize Windows into Application Icon, which keeps minimized windows stored within the app’s icon in the Dock instead of cluttering it with separate thumbnails. This setting, found in System Settings > Dock & Menu Bar, helps maintain a cleaner Dock while still allowing easy access to minimized windows with a simple click.

Adding, Removing, and Grouping Apps

A well-organized Dock makes launching applications more efficient. You can add or remove apps by dragging icons in or out of the Dock. For better structure, spacers can be added using Terminal commands to create visual groupings between app icons, improving organization.

Another useful customization is using folders in the Dock to group similar applications. By dragging multiple applications into a folder and adding it to the Dock, users can create categorized app collections, such as Work, Media, or Utilities, for a more streamlined navigation experience.

Making the Dock Transparent or Hidden

For users who prefer a distraction-free workspace, enabling Auto-Hide in Dock settings ensures the Dock only appears when needed. Third-party tools like cDock allow users to tweak transparency settings, add custom backgrounds, and refine the Dock’s overall look.

Using Widgets and Menu Bar Customization

Adding and Customizing macOS Widgets

Widgets provide quick access to essential information, such as weather, calendar events, and stock updates. You can add widgets by opening Notification Center, clicking Edit Widgets, and selecting from the available options. Popular widgets for productivity include Things, Fantastical, and Battery Stats.

Customizing the Menu Bar with Third-Party Tools

The menu bar at the top of the screen can become cluttered with too many icons. Apps like Bartender help organize menu bar items by hiding less frequently used icons and keeping only essential ones visible. This enhances usability while maintaining a clean aesthetic.

Using Control Center for Quick Access

macOS’s Control Center can be customized to include frequently used functions like Wi-Fi, Bluetooth, and screen brightness. Users can rearrange or add controls through System Settings > Control Center, making frequently accessed settings easier to manage.

Advanced Customization with Third-Party Tools

Installing macOS Theme Packs

For users who want an entirely new look, MacForge allows the installation of custom macOS themes. These themes modify window appearances, menu bar designs, and UI elements. However, since macOS updates may break theme compatibility, always ensure your software is up to date before applying themes.

Customizing Icons and Fonts

If you prefer a unique visual style, LiteIcon lets you change default macOS system icons, while tools like TinkerTool enable font customization for a more personalized UI.

Automating Desktop Customization

For those who switch between different workflows, Apple Shortcuts can automate desktop layout changes. You can create shortcuts to adjust Dock settings, switch wallpapers, and change themes based on different tasks.

Personalizing Multi-Display and Virtual Desktop Setups

Setting Up Multiple Displays for Maximum Productivity

If you use external monitors, arranging them properly in System Settings > Displays ensures a seamless workflow. Aligning screens and setting a primary display improves navigation efficiency.

Using Mission Control and Spaces for Virtual Desktops

Mission Control allows users to create multiple desktops (Spaces) for different tasks. Apps can be assigned to specific Spaces for better multitasking and organization.

Keyboard Shortcuts for Quick Navigation

macOS offers keyboard shortcuts for switching between Spaces and displays quickly. Customizing shortcuts in System Settings > Keyboard > Shortcuts can improve workflow efficiency.

Transform Your Mac into a Personalized Workspace

Customizing your Mac’s desktop enhances both visual appeal and productivity. By selecting the right themes, organizing files, and tweaking system settings, you can create a workspace that reflects your style and optimizes efficiency. Experiment with different layouts and tools to find the perfect setup that suits your workflow and creativity.