Troubleshooting WiFi Issues on Mac
Resolving WiFi Issues on Mac
Weak WiFi is one of the most common problems Mac users face around the world. With remote work, video calls, and cloud-based apps, a stable internet connection is essential for smooth work. It is not just for people working from home but also for content creators, students, and casual users who want to stream music or movies.
A dropped connection can delay deadlines or interrupt leisure activities. Reliable WiFi impacts both professional tasks and personal entertainment. Even non-technical users can follow these steps with minimal guidance.
When a Mac cannot connect to the internet or the signal keeps dropping, productivity can suffer and frustration can pile up. However, you do not always need to call tech support. Many simple WiFi issues can be resolved using built-in tools in macOS.
Common Causes of WiFi Problems on Mac
Not all WiFi issues are due to hardware. Sometimes interference from other devices, outdated settings, or software glitches cause them. In crowded areas with many networks, like apartment buildings, overlapping signals often lead to interference. Older routers may use outdated firmware that clashes with the latest macOS versions. Security settings, such as encryption type mismatches, can prevent a Mac from connecting.
There are times when WiFi works fine on other devices but not on a Mac. In such cases, unusual DNS settings, custom proxies, or corrupted network profiles can block connectivity.
Using Wireless Diagnostics in macOS
macOS includes a tool called Wireless Diagnostics that helps examine your WiFi connection. To use it:
- Hold the Option key and click the WiFi icon in the menu bar.
- Choose “Open Wireless Diagnostics.”
- Follow the on-screen instructions.
This tool scans network health for interference, weak signals, and configuration errors. The process takes a few minutes and gathers data about nearby networks. After scanning, a report appears with signal strength graphs over time. These graphs show fluctuations in real time. By reviewing channel usage, security types, and connection rates, you can decide if adjusting settings might help.
After the process finishes, Wireless Diagnostics provides recommendations you can apply directly. It also generates a detailed report you can save and share with support teams if needed.
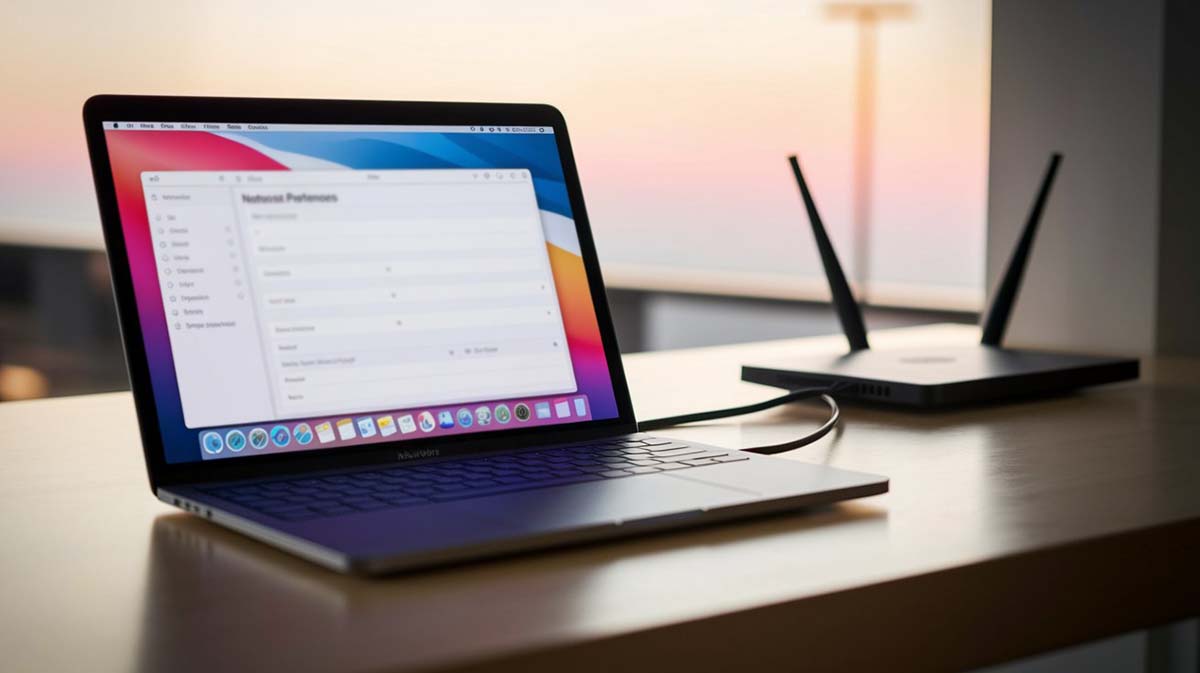
Resetting WiFi Preferences
Sometimes corrupted network configurations cause issues. To reset:
- Turn off WiFi from the menu bar.
- Open Finder, select Go, then choose Go to Folder.
- Enter:
/Library/Preferences/SystemConfiguration/ - Locate and delete these files:
com.apple.airport.preferences.plistcom.apple.network.identification.plistNetworkInterfaces.plistpreferences.plist
After you delete these files, restart your Mac. When it powers back on, the system resets WiFi settings. This often removes problematic configurations. Keep your WiFi passwords handy, as you will need to rejoin networks afterward.
Updating macOS Software
macOS updates often include bug fixes for WiFi performance. Make sure your system is up to date:
- Go to System Settings, then General, and select Software Update.
- Download and install any available updates.
These updates not only add features but also improve compatibility with routers and WiFi protocols. You may also want to check your router’s admin page for firmware updates. Updating router firmware can resolve hidden compatibility issues and boost overall network stability.
Switching WiFi Channels
In busy environments like offices or urban areas, WiFi channels can overlap. Use Wireless Diagnostics to check which channels are congested. On a 2.4GHz band, channels 1, 6, and 11 usually have the least overlap. If your router supports 5GHz, it offers more channels and less interference.
If you have router access:
- Log in to its admin panel using a browser.
- Change the channel to a less crowded frequency, such as 5GHz if supported.
The auto mode may not always pick the best channel, so manually selecting a channel can improve performance. Testing both 2.4GHz and 5GHz bands helps you find the strongest signal for your environment.
Avoiding Physical Interference
Metal, concrete walls, and other electronics can affect signal strength. Keep the Mac and router in the open if possible. Position the router on a shelf or desk rather than the floor to minimize obstacles.
Fluorescent lights, cordless phones, and baby monitors may also cause interference. If possible, position the router away from these items. Distance from the router also matters.
Removing Saved WiFi Networks
Having too many saved networks can cause conflicts. To remove unused ones:
- Go to System Settings, then Network, and select WiFi.
- Click “Known Networks.”
- Delete networks you no longer use.
This helps the system avoid confusion when multiple routers share the same SSID. You can also adjust the priority of saved networks so the Mac always attempts the strongest network first.
Resetting SMC and NVRAM
If WiFi issues persist, resetting the SMC (System Management Controller) and NVRAM (non-volatile RAM) may help. The SMC handles low-level functions like power and thermal management. NVRAM stores settings such as sound volume and recent kernel panic information.
On M1 or M2 Macs, this happens automatically on reboot. For Intel-based Macs:
- Shut down the Mac.
- During power on, press and hold Option + Command + P + R together.
- Release after about 20 seconds.
After restarting, you may need to adjust display resolution or sound settings. If WiFi still fails, repeat this step to rule out persistent low-level issues.
Using Ethernet as an Alternative
While troubleshooting, you can use an Ethernet cable if available. Wired connections are more stable and not affected by wireless interference. For Macs without an Ethernet port, use a USB-C to Ethernet adapter. This is useful for important meetings or when uploading large files.
Ethernet often provides faster speeds. Many users forget that Ethernet can bypass WiFi issues completely in busy environments.
Other Factors to Consider
Third-party apps like VPNs, firewalls, or network monitoring tools can impact WiFi performance. Try disabling them temporarily to see if they cause a problem. Security software may block ports or alter traffic, slowing your connection.
Some users rely on WiFi extenders. While extenders extend coverage, they can sometimes introduce latency. A mesh system often handles roaming between nodes more smoothly than a traditional extender. If possible, test performance directly from the main router to compare speeds.
Distance clearly affects signal strength. Check for router settings like QoS (Quality of Service) that might throttle bandwidth.
Pros and Cons of Resetting Network Settings
This section uses bullet points for a clear comparison.
Benefits:
- Quickly resolves most software-related issues
- Clears old and conflicting network profiles
- Improves the chance of a stable connection
- Removes invalid or outdated network entries
Limitations:
- Requires re-signing into all WiFi networks
- May lose manual IP or DNS settings
- Does not fix hardware problems
- May need to reconfigure VPN or proxy settings
Seeking Professional Support
If issues continue after trying these steps, the problem might be hardware-related. The Mac’s WiFi card could be faulty or physically damaged. In rare cases, factory defects or age cause failure.
It is best to have an authorized service provider check the device if it is still under warranty. Apple Stores and certified repair shops offer diagnostics. When contacting support, provide the saved diagnostic report from Wireless Diagnostics. This report often contains error codes and details that speed up the repair process.
Avoid opening or repairing hardware yourself if you lack experience, as this may void the warranty.
Not all WiFi issues require complex solutions. In many cases, the right information and some patience can resolve problems. By understanding where issues may originate and following correct steps, restoring a stable connection becomes simpler. To maintain a healthy connection, check router placement, update firmware, and review network settings regularly.
Periodically rebooting the router can also help clear temporary glitches. Keep an eye on software updates for your Mac and router to stay ahead of issues and settings. If you want to verify your speed, run an online test and compare results to your plan. A consistent internet check helps catch problems early. With a proactive approach, most Mac users enjoy reliable WiFi without needing expert help.