Macfriendly.org

Loading

Archives 2025

Managing Startup Items on Mac

Managing Startup Items on Mac

Manage Startup Items on Mac for a Faster Boot

Whether you’re editing videos, handling client data, or managing schedules, a Mac that boots up slowly can disrupt your entire flow. Over time, programs tend to accumulate in the startup queue without users even realizing it. This causes delays that eat into your productivity, especially during tight mornings. Fortunately, there are proven ways to manage startup items that can bring back the speed and responsiveness your Mac once had.

In This Guide
• How startup apps influence performance
• Steps to view and adjust login items
• Third-party tools to control what runs at boot
• Smart tips to maintain startup speed every day

Why Startup Items Matter in Daily Work

Each time your Mac turns on, certain apps begin running immediately. These can range from essential tools like antivirus software and password managers to cloud sync platforms and messaging apps. While some of these are useful, others might be outdated or unnecessary. When too many launch at once, it causes the system to slow down, and boot time increases.

Think of a web designer in London. She noticed her MacBook took nearly a minute to become usable after startup. After checking her login items, she found five apps loading by default, three of which she no longer needed. Removing them shaved nearly 40 seconds off her boot time.

Checking What Starts Automatically

You can find out what applications are launching automatically by following these steps:

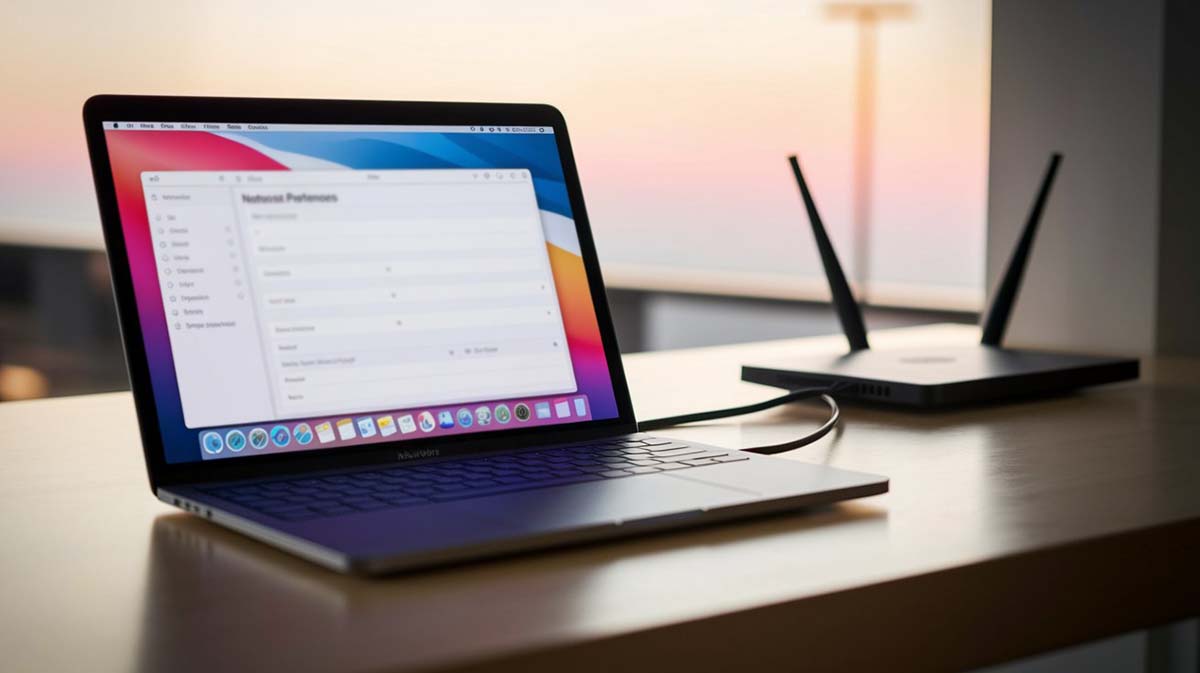
  1. Click on the Apple logo and choose System Preferences.
  2. Navigate to Users & Groups.
  3. Select your user account, then go to the Login Items tab.

This section displays the apps set to start each time you log in. Some might be familiar, while others may be leftover from apps you’ve uninstalled. If an entry looks suspicious or outdated, it’s worth investigating further.

Adding or Removing Items From Startup

Adjusting startup items is straightforward. Follow these instructions:

To add a new item:

  1. Click the plus button beneath the list.
  2. Browse for the app you want to add and click Add.

To remove an item:

  1. Select the app from the list.
  2. Click the minus button to delete it from startup.

As a general rule, keep only essential items like security software or communication tools. Every removed app reduces memory usage and allows your system to focus on launching faster.

Tools That Offer More Control

For those looking for deeper management, third-party applications offer features that macOS does not provide by default:

  • CleanMyMac X – This tool includes a startup manager and highlights apps, login agents, and launch daemons. You can toggle items off without deleting them.
  • App Tamer – Ideal for controlling background CPU usage. If you want certain apps to pause during idle time, this utility helps extend battery life and improve startup speed.
  • Lingon X – More advanced users can use it to create or manage scripts that run at login. It’s helpful for automated tasks like syncing folders or launching specific workflows.

Many small businesses in Asia use Lingon X to automate boot-time tasks. For example, a tech consultant in Singapore set up a script that opens analytics reports automatically upon login, saving him several clicks each day.

Practical Tips to Keep Your Mac Fast

Even without advanced software, these small steps go a long way:

  • Update macOS and applications regularly to reduce compatibility issues.
  • Check login items monthly to keep the list relevant.
  • Use solid-state drives (SSD) if you haven’t already—they reduce boot times dramatically.
  • Clear your browser and system cache at least once a week.

Clean systems not only start faster but also avoid unexpected crashes or freeze-ups during work sessions.

Common Startup Problems and Fixes

Mac Freezes During Boot
This is usually due to outdated or conflicting startup items. Disable all entries temporarily, then re-enable them one by one to identify the culprit.

Startup Item Won’t Go Away
Sometimes, uninstalled apps leave background processes. Use CleanMyMac X or the Terminal to remove hidden launch agents.

Apps Launch Without Being in Login Items
Check if the app has a preference setting that allows it to launch on boot. Disable it from within the app itself.

User Story: Content Creator in Argentina

A filmmaker based in Buenos Aires used Dropbox, Google Drive, and OneDrive—all syncing large media files at boot. After disabling all but one, he reported that his iMac now starts 50% faster. This gave him more editing time during peak creative hours.

Why Routine Checks Help

Applications often update and enable new services during installation. What wasn’t on your startup list last week might suddenly appear today. That’s why making it a habit to inspect login items once a month can help prevent slowdowns. It’s like cleaning out a closet—frequent checks keep things neat.

Advice for Small Business Owners

In retail and service industries, teams often share devices. When each team member adds apps to startup, boot time increases. One café in Berlin resolved this by assigning one administrator account responsible for managing startup settings across all shared devices. It kept their systems lean and responsive even during busy mornings.

Optimizing Sync Behavior

Syncing large folders at startup can be a performance drain. Cloud tools like iCloud, OneDrive, or Dropbox offer manual sync settings. Instead of launching these tools immediately, consider starting them once your main tasks are completed.

Hidden Startup Culprits

A sales manager in Dubai shared that his device always loaded a virtual meeting app with screen sharing tools and custom backgrounds. He didn’t even realize it until his Mac took longer to reach the desktop. Disabling it from the login list saved him minutes each morning and helped reduce boot-time crashes.

Prevent Future Slowdowns

Keep your startup item list simple. Remove old tools, test new ones cautiously, and review your system regularly. This small habit ensures your Mac works with you, not against you.

Preparing for What’s Ahead

Even with Apple’s newer chip architecture promising faster performance, manually managing startup processes will always give users better command of their machines. It’s the balance between system automation and personal control that delivers the best experience.

Installation Reminders

When adding new software, read the install prompts carefully. Many apps auto-check the “launch at login” box. If you don’t need it at boot, uncheck it right away.

What Matters Most

From creative work to business reporting, a smooth startup process sets the tone for the rest of your day. Whether it’s cutting five seconds or a full minute, every improvement counts. Don’t underestimate the value of taking control of what starts with your Mac.

Once you get into the habit of auditing your login items and trimming unnecessary apps, you’ll find your computer feels faster, your workflow starts stronger, and your daily routine runs more smoothly. It’s a small step that brings consistent results.

Using Terminal for Basic Mac Commands

Using Terminal for Basic Mac Commands

Many users don’t realize just how much control they can have over their Mac. Beyond the usual buttons and graphical menus lies a powerful tool: Terminal. This simple-looking app lets you talk directly to the macOS system, using only text commands. It’s fast, efficient, and surprisingly easy to learn.

While it’s often seen as something only developers use, Terminal can be useful to anyone. Whether you’re organizing files, working with folders, or trying to get things done faster, Terminal offers a direct path from idea to action.

Why Everyday Users Can Benefit from Terminal

There’s nothing wrong with using the Finder to drag and drop files, but there are times when it can feel slow or limiting. Terminal allows users to skip all the clicking and go straight to the task. With just one command, you can create folders, rename files, delete items, or move things around.

Many writers, editors, and artists use Terminal for tasks like copying content, cleaning up folders, or setting up backups. It doesn’t take much to start. One command can do what might otherwise take five or ten clicks.

Take for example a freelancer working on dozens of client folders. Instead of clicking into each one to check for files, they can use Terminal to list them all at once. This not only saves time but also reduces the risk of errors.

Opening Terminal and Running Your First Command

To begin using Terminal, go to Applications → Utilities → Terminal. When you open it, you’ll see a black window with white text. Don’t be intimidated. The command line only responds when you type something in, so you’re in full control.

Try typing this:

echo "Hello, world!"

When you press Enter, you’ll see the same phrase displayed below. That simple example proves how immediate the response is. It’s like giving a direct instruction to your Mac and watching it obey.

Think of it as a quiet conversation between you and your computer—one where you’re always understood.

Key Commands for Files and Folders

Terminal gives you quick control over your files. Here are a few commands that are useful:

  • ls – Lists everything in your current location.
  • cd – Changes your working directory.
  • mkdir – Makes a new folder.
  • rm – Removes files or folders.

Here’s a step-by-step use case:

mkdir Project
cd Project
touch notes.txt
ls
rm notes.txt

First, you create a folder named Project. Then, you enter that folder. With touch, you make a new file. Using ls, you can check that the file was added. Finally, rm deletes the file.

Tips for Safer and Faster Usage

Terminal gives you a lot of power. That’s why it’s important to use it wisely. One example is the rm command. When you delete a file this way, it skips the Trash. If you make a mistake, the file could be lost forever.

To avoid that risk, add a safety check with this command:

rm -i notes.txt

This asks for confirmation before deleting anything.

Another smart tip is to set up shortcuts. These are called aliases. You add them to a file like .bash_profile or .zshrc, which lives in your home directory.

For example:

alias docs="cd ~/Documents"

After saving and reopening Terminal, typing docs takes you straight to your Documents folder. It’s a small time-saver that adds up over the course of a day.

Fixing Common Errors in Terminal

Sometimes, Terminal won’t let you do something. A message like “Permission denied” means you’re trying to access something you don’t have the right to change.

You can fix this by using sudo, which runs commands with administrator access:

sudo rm -i important.txt

After typing your password, the command will run. Be extra careful when using sudo, because the system won’t ask twice.

If you’re managing software or tools through Homebrew, you’ll want to keep everything updated:

brew update
brew upgrade

These two commands check for new versions of your installed software and install them. This keeps everything running smoothly.

Real Examples of Terminal Making a Difference

A video editor in Spain needed to archive hundreds of project files. Instead of clicking through them one by one, she used a single command:

tar -czf archive.tar.gz ~/Videos/*.mp4

It compressed everything into one neat file in seconds. Doing this manually would have taken much longer.

In California, a game developer needed a fast way to test builds. He used Terminal to run a local web server:

python -m http.server

Within five seconds, the game was running in his browser, ready for testing. He didn’t need to install any extra tools or use complicated menus.

Make Terminal Feel Like Your Own

You can customize how Terminal looks. Open Preferences and you’ll find options for colors, fonts, and themes. Many users like the “Solarized Dark” theme because it’s easier on the eyes during long sessions.

You can also change what the prompt looks like. That’s the part that shows where you are and waits for your input. Add this to your .zshrc file:

PROMPT="%n@%m %1~ %# "

This version shows your username, the machine name, and your current directory. It’s a small detail, but it helps you stay oriented as you work.

Working Together with Visual Studio Code

Many developers use Terminal inside code editors like Visual Studio Code. This lets them write code and run it in the same place.

To use this feature, open View → Terminal inside VS Code. A Terminal window will appear at the bottom.

Let’s say you’re building a website. You can install packages and run the server like this:

npm install
npm run dev

Now you can edit your code and see the changes live, without leaving your editor. It’s efficient and keeps your focus where it belongs.

More Everyday Uses You Might Like

Even if you’re not a developer, Terminal can still be useful. Here are a few more ideas:

  • Quickly rename multiple files.
  • Back up important folders with a script.
  • Search for large files taking up space.
  • View hidden files that Finder doesn’t show.
  • Monitor system performance with live updates.

Once you learn a few more commands, you’ll find yourself relying on Terminal more often. It becomes like a second set of hands for your computer tasks.

Make It a Habit, Not a Challenge

Learning Terminal might seem strange at first. But once you try it, you’ll start to see the benefits. It’s not about being technical. It’s about working smarter.

You don’t need to memorize every command. Just start with the basics. Over time, you’ll build a set of tools that make your work faster and cleaner.

Terminal isn’t just for experts—it’s for anyone who wants more control, more speed, and less waiting. Whether you’re writing, coding, organizing, or just cleaning up, there’s probably a Terminal command that can help.

Configuring Email Clients on Mac

Configuring Email Clients on Mac

The Value of Proper Email Setup on a Mac

In daily life, emails remain a key part of how we stay in touch, manage responsibilities, and keep projects on track. On a Mac, setting up your email properly doesn’t just improve speed and efficiency—it brings peace of mind. When your inbox is reliable, you spend less time troubleshooting and more time focusing on things that matter. From sending business documents to receiving family updates, a well-configured setup plays an essential role in how communication flows.

Getting it right means fewer missed opportunities and fewer delays. Whether you’re a student submitting assignments, a professional coordinating team meetings, or a business owner dealing with client requests, having a working and reliable email system is non-negotiable.

Choosing the Right Email Client

Your choice of email client depends on what you need most—simplicity, advanced tools, or flexibility. There are several great options available for Mac users, each with distinct features that serve different preferences. The right choice can significantly affect your daily workflow.

Apple Mail

Apple Mail comes pre-installed and is tightly connected to other Apple services. This integration makes it especially appealing to users already in the Apple ecosystem.

  • Easy to set up and use
  • Syncs with Calendar and Contacts automatically
  • Works well with major services like iCloud, Gmail, and Yahoo

While the interface is clean, it may feel basic for those who prefer more sorting or tagging functions. Still, for many users, the balance of simplicity and reliability is more than enough. It’s also designed to minimize distractions, making it ideal for users who value a clean interface.

Outlook for Mac

Outlook shines for users who deal with large volumes of messages, tasks, and events. It’s a strong pick if you’re used to Microsoft apps.

  • Offers excellent calendar and task integration
  • Syncs efficiently with Microsoft 365 and Exchange
  • Useful for managing multiple mailboxes

Keep in mind that it uses more memory and may feel slower on older Macs. That said, its robust feature set makes it ideal for power users who handle many appointments, attachments, and collaboration tools.

Mozilla Thunderbird

For users who like customization and open-source tools, Thunderbird is a top contender.

  • Add-ons allow you to tailor the experience
  • You can change layouts, themes, and workflows
  • Built-in RSS reader for news tracking

Some users may find its setup less intuitive at first, but once familiarized, it becomes powerful and dependable. It also appeals to those who prefer a privacy-focused experience, as it doesn’t track user behavior like some commercial apps do.

Preparing Your Account Settings

Before starting the setup process, collect the following information from your email service provider:

  • Whether your account uses IMAP or POP
  • Server address for incoming mail (e.g., imap.gmail.com)
  • Server address for outgoing mail (SMTP)
  • Port numbers and the encryption method
  • Your full email address and password

These details are essential to ensure everything connects smoothly. Most providers display this information on their help pages, so it’s best to copy it directly to avoid typos.

Understanding IMAP and POP

IMAP keeps your emails in sync across all devices. It’s ideal for users who switch between phones, tablets, and computers. Changes made on one device reflect everywhere. You can also manage folders across devices, so organizing emails becomes easier.

POP, on the other hand, downloads messages to your Mac and stores them locally. Once downloaded, emails are removed from the server. This method works best if you only use one device to check mail. It’s also useful in limited connectivity areas since all content is stored offline.

Adding a Gmail Account

  1. Open Apple Mail
  2. Click Mail > Add Account
  3. Choose Google from the list
  4. Follow the sign-in prompts
  5. Use an app-specific password instead of your regular Gmail password, if required
  6. Log in and make sure IMAP is turned on in your Gmail settings online

If you experience errors, double-check your password or ensure two-step verification is enabled. Gmail also requires permission for less secure apps, so allow access when prompted.

Customizing Email Preferences

Fine-tuning your email client makes daily tasks easier and more efficient. Simple customizations often lead to a more personalized and smooth experience. Small adjustments can save you minutes per day, adding up over time.

Signature Settings

A professional signature adds credibility to your emails. Include your name, title, company (if applicable), and alternative contact details. This helps recipients know exactly who you are and how to reach you. Avoid images that may not load on every device and keep formatting clean.

Email Rules

Rules automate how your inbox handles messages. For instance:

  • Move all emails from your manager to a “Work” folder
  • Send receipts directly to a “Finance” folder

These filters keep your inbox clean and help you find messages faster. You can also create rules for color-coding messages or setting custom alerts for key contacts.

Notifications

You can decide which accounts send alerts and what kind of notifications they trigger. Some users prefer quiet inboxes with only sound alerts for high-priority messages. Adjusting this ensures you’re not overwhelmed throughout the day.

Securing Your Email Setup

Digital safety matters. Setting up your email with protection in mind helps you avoid common threats like unauthorized access, phishing, and data loss. These steps are often overlooked but are essential in keeping your personal information out of the wrong hands.

Using SSL and TLS

Enable encryption protocols like SSL and TLS for both incoming and outgoing servers. These ensure that your messages are not readable during transfer. Without them, your data may be exposed to third parties during transmission.

App-Specific Passwords

Use unique passwords for each mail app connected to your account. If one becomes compromised, your main account remains safe. Most major email providers support generating these temporary login codes.

Two-Factor Authentication

2FA adds another level of security. Even if someone learns your password, they can’t log in without the secondary verification code, usually sent to your device. It’s a simple step that makes a huge difference in protecting your account.

Troubleshooting Common Problems

Problems happen. Knowing what to do when something breaks helps avoid frustration. Here are several of the most frequently reported issues and how to fix them.

Incorrect Credentials

Mistyped passwords or usernames are a frequent issue. Double-check spelling and case sensitivity. For services like Gmail, remember to use app-specific passwords when prompted. Also, check if your account has two-step verification enabled.

Sending Failures

If you can receive emails but not send them, verify your SMTP settings. Look at the server address and make sure ports 465 or 587 are active. These are commonly used with SSL/TLS. Also, confirm that your ISP doesn’t block outgoing mail.

Spam Mislabels

Sometimes, valid messages go to the spam folder. Adjust your filters and mark trustworthy contacts as safe senders. This improves your inbox’s accuracy. Occasionally review your spam folder to rescue falsely flagged emails.

Folders Not Showing

For IMAP setups, folder syncing can be a problem. Recheck your client settings or restart the app to reload your mail structure. If the issue persists, log into the webmail interface and confirm the folders are active there.

Tips for Daily Use

A smooth email experience starts with preparation. Choose the app that feels right, gather your setup details ahead of time, and secure your settings. Once in place, small adjustments like adding filters or color tags improve how you interact with your inbox. With regular backups and updated security measures, your messages remain safe and accessible.

Mac users benefit from email clients that blend speed with convenience. When your setup supports your habits, you spend less time managing email and more time making progress. Whether for personal updates or business projects, a dependable email setup keeps everything running without interruption.

By following the best practices in this guide, you’ll ensure that your email experience on a Mac is smooth, reliable, and safe. It’s a worthwhile investment in both productivity and peace of mind.

Evaluating Mac Printer Options

Evaluating Mac Printer Options

Choosing the Right Printer for Mac: A Comprehensive Review

Whether you’re a creative based in Berlin or managing a startup in São Paulo, one challenge remains consistent—getting reliable, high-quality prints from macOS. A printer that doesn’t align with your workflow can delay client projects, waste ink, and increase costs. So before making a purchase, it’s worth examining not just the price tag, but also speed, software compatibility, and long-term expenses.

Quick Glance

This guide answers three main questions:
1) What factors should be evaluated when selecting a printer for Mac?
2) How do inkjet, laser, and multifunction units compare in terms of speed, color quality, and overall cost?
3) Which models are in demand globally—and why?

By the end, you’ll have a clear sense of which printer fits your workflow, no matter where you’re located.

Why Smart Selection Matters

Getting the wrong printer can lead to ongoing headaches. Based on a 2024 report from Keypoint Intelligence, more than 38% of small offices in Europe replaced their printers within the first two years due to maintenance costs being higher than expected. If your primary platform is macOS, the risk increases if you don’t confirm driver support and firmware update schedules. Once support stops, print delays may arise—or worse, features like AirPrint may no longer function.

Some printers appear budget-friendly at first but come with hidden issues—poor compatibility, outdated drivers, or missing features. If you’re working with time-sensitive deliverables, any delay can quickly escalate into missed opportunities. That’s why assessing not just initial features but also the long-term reliability of updates and ecosystem support is vital.

Key Factors to Evaluate

Print Speed (PPM)

If you’re assembling marketing materials for global use, every minute counts. Home office inkjet printers average around 10–15 ppm for black and white. Laser units typically reach 30–40 ppm, ideal for heavier workloads and larger print batches.

Also consider warm-up time. Some laser printers require 15–30 seconds to initiate printing, which can matter in a high-demand environment. Models with instant-on technology help reduce lag and improve productivity.

Clarity and Color Saturation

Speed means little to a photographer in Melbourne if colors come out dull. Look for DPI ratings—the standard for sharpness. The Epson EcoTank Pro ET-16680, for instance, offers 4800×1200 DPI, known for consistent tone and gradient output.

When working with branding materials, color fidelity is crucial. Skin tones, logo hues, and gradient transitions must remain consistent. High DPI combined with pigment-based inks ensures the kind of output designers can trust.

Connectivity Options

Check for USB-C, Wi-Fi 6, and Bluetooth 5.3. As hybrid work becomes more common, your printer should handle tasks from a Mac mini at home or a MacBook Air at a café in Amsterdam with equal ease.

Some printers now support direct cloud access, allowing you to print from Google Drive, Dropbox, or iCloud without needing to transfer files to a local machine first. This flexibility is especially helpful for distributed teams or freelancers constantly moving between devices.

Device Lifespan and Ownership Cost

A low upfront price can be misleading. Include expenses for ink or toner, drum units, and power consumption. IDC reports that up to 65% of a printer’s five-year cost comes from consumables.

Printers with larger ink reservoirs or toner capacities can significantly reduce per-page costs. It’s also helpful to choose models with replaceable components, so you’re not forced to discard the whole unit when one part wears out.

Printer Categories and Their Strengths

  • Inkjet Printers – Affordable and good with color, but slower and have higher ink costs per page.
  • Laser Printers – Often favored by accounting departments in Zürich for bulk printing due to their fast speeds and low per-page cost.
  • Multifunction Units – Include a scanner and copier. Perfect for coworking spaces in Toronto with limited desk space.

If you need to send signed documents or scan IDs, the multifunction unit becomes especially useful. It reduces reliance on third-party scanners or phone apps and ensures higher-quality digital captures.

How macOS Communicates with Printers

The latest macOS releases, including Sonoma, offer driverless printing via AirPrint and Mopria. Still, not all printers qualify. Check Apple Support’s compatibility list before you commit. Firmware patches typically arrive during Q1 and Q3—apply them regularly to avoid vulnerabilities.

For office setups, consider using IPP over USB. This helps route print jobs directly to network printers, minimizing job delays and reducing errors. Some enterprise environments even segment printers by VLAN to prioritize traffic for high-volume departments.

Efficiency and Environmental Focus

Sustainability is now a major concern. New laser printers often use low-melting-point toner to lower energy consumption. For example, HP’s LaserJet Enterprise M555dn uses just 0.3 kWh per day in sleep mode, based on Energy Star 8.0 benchmarks.

Ink options also matter. Refillable tank systems reduce waste and lower the need for constant cartridge replacements. While initial costs can be higher, total operating expenses decrease significantly over time. For small businesses or studios printing several hundred pages a month, the savings add up.

Side-by-Side Comparison of Leading Models

HP OfficeJet Pro 9015e

Delivers 22 ppm in color and integrates seamlessly with the HP Smart app. In a 2024 PCMag survey, it earned 9.2/10 for reliability with macOS. Features include auto-duplex printing, remote mobile print support, and strong wireless stability. Ideal for teams with moderate print volume and color demands.

Canon imageCLASS MF645Cx

A laser-based model that excels in speed and efficiency. Its built-in AirPrint and Secure Print PIN features make it well-suited for health-tech startups handling confidential data. With a 250-sheet paper tray and multi-format output capability, it suits diverse workflows and mid-sized teams.

Brother HL-L2370DW

Though monochrome only, it handles daily document printing well. Equipped with Wi-Fi Direct, it allows MacBooks to print without a router. It received Buyers Lab’s “Winter Pick” in 2025 for small office use. It’s also remarkably quiet for a laser printer, making it ideal for shared workspaces.

Epson EcoTank ET-3850

This refillable tank printer produces up to 15,000 pages before needing a refill. A smart pick for design studios in Copenhagen that print multiple proof copies. It supports Apple Silicon Macs without driver installation and includes a flatbed scanner with 1200 DPI resolution—useful for design drafts.

Setup and Maintenance Tips

Before unboxing your new unit, make sure macOS is fully updated. The latest patch addresses USB over IP issues that affected some Big Sur and Monterey versions. If you’re using a laser printer, run a calibration cycle every three months. Inkjet users should avoid letting ink levels fall below 20% to prevent air bubbles that cause banding.

For distributed teams, a cloud print queue like PaperCut Mobility simplifies things. It eliminates the need for driver installs and tracks page counts per user—useful for cost-sharing across coworking locations from Nairobi to Toronto. This also enhances audit control and streamlines device management.

Staying Ready for What’s Next

The shift toward edge printing via ARM-based platforms is gaining pace. This might soon allow printers to act as USB-C hosts for iPhones. When thinking about future needs, consider models that can support upcoming protocols such as Wi-Fi 7 and the Matter standard.

Some units are already being developed with modular slots for connectivity add-ons. Selecting printers with such expandable architecture ensures that you won’t need to replace them entirely once new standards emerge.

Final Notes Before You Decide

Buying a printer isn’t just adding another piece of equipment to your workspace. It becomes a long-term partner in producing contracts, artboards, or school papers. If you take time to assess the types of documents you print, your required speed, and projected costs, the right model will match your rhythm.

Before clicking “buy” or heading to a store, revisit these factors and align them with your daily needs—whether you’re using a Mac Studio at a corporate desk or a MacBook Air across shifting time zones. That way, you’re not just printing sheets, but creating results you can be proud of.

Personalizing Menu Bar on Mac

Personalizing Menu Bar on Mac

Personalizing Your Mac’s Menu Bar: A Step Towards Customizing Your Workflow

For many Mac users, the menu bar is more than just a visual element—it’s the command center for their daily tasks. Whether you’re a professional content creator, a social media enthusiast, or someone who simply values efficiency, personalizing your menu bar can make a significant difference in how you interact with your Mac. From the ability to add shortcuts for your most-used apps to adjusting system settings at your fingertips, a customized menu bar can streamline your workflow and improve your overall Mac experience.

Quick Overview of Personalizing the Menu Bar

When you start adjusting your menu bar, the options are extensive. You can:

  • Rearrange your menu items to prioritize your most-used tools.
  • Add or remove apps from the menu bar for quick access.
  • Modify icons for better clarity and personalization.
  • Enable system preferences for a more personalized experience.

This article will walk you through the steps to personalize the menu bar, explore the benefits of doing so, and provide examples of useful menu bar tweaks.

Why Personalizing Your Menu Bar is Worth Your Time

The menu bar serves as a hub for numerous functions on your Mac. Personalizing it ensures that you don’t have to dig through menus or launch apps from the Dock repeatedly. Instead, you can focus on tasks that matter most. Here’s a closer look at why these customizations are not just a cosmetic upgrade but a productivity booster.

Prioritize What Matters Most

One of the first steps in personalizing your menu bar is deciding what apps and tools you need immediate access to. By arranging these elements, you ensure that everything you require is always just a click away. For instance, if you frequently use apps like Mail or Calendar, placing them in the menu bar will reduce the time spent navigating through the MacOS interface.

A good rule of thumb is to place the tools that you access throughout the day in the top row of your menu bar, where they’re easy to reach. This arrangement is perfect for users who want to minimize distractions while maximizing efficiency.

Add Custom Icons for Clarity

Another fantastic way to personalize your menu bar is by changing or adding custom icons. The default icons for system functions like Wi-Fi or Bluetooth can sometimes get lost in the shuffle, especially if you have many apps in your menu bar. By choosing icons that are more meaningful or visually distinct, you make it easier to identify what each button does, saving precious time when you need to access a specific function.

You can also tweak the appearance of app icons with third-party applications. Some tools allow you to create icons with your own branding, adding an additional level of personalization to your Mac setup.

Clean Up by Removing Unused Items

Just as adding useful tools to the menu bar can improve your workflow, removing unnecessary ones can create a cleaner, less cluttered workspace. Over time, your menu bar may accumulate icons from apps that you no longer use. Fortunately, you can remove these items in just a few steps. This not only clears up space but also declutters the interface, allowing you to focus on what’s truly important.

Using Third-Party Tools for Advanced Customizations

For users who want even more control over their menu bar, third-party apps are a great option. Tools like Bartender allow you to hide, rearrange, and organize your menu bar items in ways that go beyond the default MacOS options. With such apps, you can group similar tools together, make certain items hidden until needed, and tweak the way icons behave when clicked.

Accessibility and Quick Adjustments

Personalizing the menu bar also has the added benefit of improving accessibility. By adding the tools you use most, you reduce the need to navigate to different sections of your system, making it faster and easier to access various functions. For people with disabilities or those who require extra assistance, these small adjustments can make a significant difference in everyday interactions with a Mac.

Step-by-Step Guide to Personalizing the Menu Bar

If you’re ready to dive into customizing your Mac’s menu bar, here’s a simple step-by-step guide to get started:

1. Rearrange Menu Bar Items

Rearranging the items in your menu bar is simple. Just hold down the Command key and drag the icons to the desired location. This works for most apps and system functions. You can place the most important items closer to the center for easy access.

2. Add or Remove Items

To add new items to the menu bar, go to the System Preferences section on your Mac. Under the Menu Bar settings, you can enable or disable various icons like Wi-Fi, Bluetooth, or Time Machine. Apps like Dropbox or Google Drive can also add their icons to the menu bar automatically when they’re installed.

If you want to remove an item, hold the Command key and click the icon. This will reveal the option to remove or hide the item.

3. Use Third-Party Apps

As mentioned earlier, there are several third-party applications that can extend your menu bar’s functionality. Bartender, for example, offers a powerful set of tools for managing your icons. You can hide items you rarely use, organize them into groups, or make them visible only when clicked.

4. Customize Icons

Some apps allow you to change their icons directly within the app’s settings. For others, you may need to use a third-party tool to replace default icons with custom ones. Apps like LiteIcon let you replace system icons with your own.

5. Adjust System Preferences

For more advanced customizations, you can access System Preferences and make additional tweaks under the Dock & Menu Bar settings. This will let you adjust the appearance of certain icons and enable features like Do Not Disturb or Battery status.

Tools to Help You Personalize the Menu Bar

While many MacOS settings can help you adjust the menu bar to your liking, the addition of third-party tools can unlock even more possibilities. Below are some apps that can assist you in making your menu bar truly yours.

Bartender

Bartender is one of the most popular tools for organizing menu bar items. With Bartender, you can hide, rearrange, or manage your icons in more ways than MacOS allows by default. The app allows you to keep your menu bar neat and organized without losing access to essential tools.

iStat Menus

For users who need detailed system information at their fingertips, iStat Menus is a perfect addition. It provides real-time data about your CPU usage, memory, network activity, and more—right in your menu bar.

ToothFairy

ToothFairy is another app that simplifies your Bluetooth connections. It allows you to quickly toggle Bluetooth devices like headphones or speakers from the menu bar, making it easier to switch between devices without navigating through settings.

Vanilla

If you’re looking for a lightweight tool to hide unnecessary icons, Vanilla might be just what you need. It’s an easy-to-use app that gives you the ability to group and hide menu bar icons, helping you declutter without making any major changes to your setup.

A Seamless Mac Experience Awaits

By personalizing your menu bar, you can transform how you interact with your Mac every day. These small tweaks not only make your workspace cleaner but also provide a more streamlined, efficient experience. Whether you’re looking to improve productivity, enhance accessibility, or just enjoy a more personalized environment, customizing your menu bar is a step in the right direction. Take the time to adjust your settings, remove unnecessary icons, and experiment with third-party apps. In the end, these adjustments can make a big impact on your overall Mac experience.

Apple Software Update Schedule

Apple Software Update Schedule

Apple Software Update Schedule: A Global User’s Practical Guide

Keeping devices updated is essential for millions of Mac, iPhone, iPad, and Apple Watch users around the world. Every new release brings improvements that boost security, performance, and overall user experience. Whether you are editing videos in Tokyo, teaching remotely from São Paulo, or managing digital content, knowing when and how updates roll out ensures smooth workflows and minimizes disruptions. This article provides a practical guide to understanding Apple’s update schedule and why it matters for everyday users and businesses alike.

Key Timelines Every User Should Know

  • Annual major updates. Announced during the Worldwide Developers Conference (WWDC) in early June and officially released in September (macOS typically follows in October).
  • Frequent minor releases. Apple deploys “point” updates approximately every four to six weeks to address bugs and introduce smaller enhancements.
  • Rapid security patches. Critical vulnerabilities are patched immediately through smaller, high-priority updates.
  • Beta programs for early access. Both developer and public beta versions are released months ahead of official rollouts, allowing early adopters to test features.

Understanding this rhythm makes it easier to plan around major changes, especially when devices are critical to professional or academic activities.

Why Staying Updated Matters

Skipping updates may seem harmless, but it can lead to vulnerabilities, performance issues, and compatibility problems. New software threats emerge daily, targeting outdated systems. Devices left on older versions may run slower or lose access to key features.

For example, a graphic designer in Berlin notices sharper color management on Final Cut Pro when running the latest macOS. Meanwhile, small business owners in Lagos rely on updated security frameworks to protect customer data during online transactions. Across industries and regions, timely updates promote safety, functionality, and efficiency.

Inside Apple’s Release Cycle

Major Annual Updates

Apple introduces major updates every year, presenting new versions of iOS, iPadOS, macOS, watchOS, tvOS, and now visionOS. Typically showcased during WWDC, these updates undergo extensive beta testing through the summer months. The full versions of iOS and iPadOS arrive in September, usually aligned with the latest iPhone launch, while macOS updates follow by October.

This predictable cycle allows developers, businesses, and general users to prepare for big changes well in advance. Planning around these releases minimizes compatibility issues and helps maintain productivity.

Minor Updates and Security Fixes

After major releases, Apple consistently rolls out smaller updates called “point” updates, such as 17.0.1, 17.1, and 17.1.1. These updates bring important improvements:

Bug fixes. Addressing issues reported by users and developers, ensuring smoother operations.

Performance enhancements. Optimizing battery life, boosting graphics capabilities, and fine-tuning system behaviors.

New minor features. Sometimes new functionalities, like updated widgets or expanded Siri commands, appear between major releases.

Alongside point releases, Apple deploys Rapid Security Responses when vulnerabilities are discovered. These patches install quickly and often avoid requiring a full device reboot, minimizing downtime and inconvenience.

Beta Testing: Early Access with Caution

Beta programs offer an early glimpse into upcoming features. Two types of beta versions are typically available:

Developer Beta. Released first, these builds are rougher and intended for developers building apps or services based on new frameworks.

Public Beta. Rolled out a bit later, public betas are more polished but still experimental.

Testing on a secondary device is highly recommended. Features like expanded Apple Intelligence capabilities may be exciting, but beta software can sometimes lead to app instability or faster battery drain.

Signing up for the beta program gives tech-savvy users a valuable opportunity to provide feedback that shapes the final release, but it also demands a willingness to tolerate occasional hiccups.

Timing Matters: The Global Impact of Update Releases

Because Apple headquarters is based in California, global users experience releases at different local times. A 7 PM release in Cupertino might land at midnight in London and early morning in Tokyo. Timing affects when users and businesses should prepare for system changes.

For global IT managers, careful scheduling matters. Some organizations delay mandatory updates to ensure:

Full system backups are available

Key internal applications are tested for compatibility

Helpdesk teams are staffed to assist with potential user questions

Using Mobile Device Management (MDM) solutions like Jamf Pro or Kandji enables organizations to schedule updates intelligently, minimizing disruptions across time zones.

Business Benefits of Keeping Software Current

Enhanced Security Posture

Cyberattacks evolve constantly, making security updates crucial. Each patch closes vulnerabilities that could otherwise be exploited. Organizations in finance, healthcare, and education sectors depend on immediate patching to meet strict security standards, including GDPR and HIPAA compliance.

Optimized Performance and Feature Access

New operating system versions enable cutting-edge features in apps. Platforms like Slack, Figma, and Adobe Creative Cloud optimize performance for the latest OS builds. Devices stuck on outdated software often face sync issues, degraded speed, and missing features like Live Text recognition.

Strengthened Brand Trust

For businesses offering consumer apps, staying aligned with Apple’s release timeline shows commitment to quality and reliability. Users expect prompt updates that work smoothly on their devices, and falling behind risks damaging trust and satisfaction.

Preparing Your Device for an Update

Before installing a new update, take simple but critical precautions:

  • Perform a full backup using Time Machine, iCloud, or another reliable method.
  • Verify that essential apps support the new operating system version.
  • Reserve enough time for installation, which can range from 30 minutes to over an hour.
  • Keep your device connected to power throughout the process to avoid interruptions.

Skipping these steps may lead to complications during installation, increasing the risk of lost data or unstable system behavior.

What’s Ahead in Future Updates

Industry experts predict stronger emphasis on personal data protection, localized artificial intelligence, and seamless interoperability between devices. Features expected in upcoming iOS and macOS versions may include on-device processing that reduces dependence on cloud servers, safeguarding privacy even further.

The speed of Rapid Security Responses will likely improve too. Safari and WebKit updates have already adopted smaller, modular patch deployments, setting the stage for faster security fixes across the board.

Apple also shows commitment to extending support for older devices. Traditionally, security patches continue for at least two major OS versions after a device’s last compatible update. This approach benefits users and institutions managing older fleets of devices, such as nonprofit schools or small startups.

Monitoring Apple’s official “vintage and obsolete” device list remains a smart practice. Knowing when a device is losing support helps users plan future upgrades wisely.

Keeping Your Devices Ready for What’s Next

Mastering Apple’s update rhythm equips you to get the most out of your devices. Whether you create digital art, develop applications, manage online stores, or simply stay connected with loved ones, up-to-date software is your partner in maintaining smooth operations.

Major releases, minor patches, and security updates form the backbone of a reliable Apple experience. Staying aware of these cycles means fewer disruptions, stronger security, and a system that supports your ambitions every day.

Keeping your Mac, iPhone, or iPad current ensures that your digital life runs faster, safer, and more reliably—today and into the future.

Speeding Up App Launch on Mac

Speeding Up App Launch on Mac

Speeding Up App Launch Times on Mac: A Practical Guide for Everyday Users

No matter where you are—whether you’re managing a remote team in Singapore, designing interfaces in Berlin, or completing your thesis in Santiago—a slow app launch can disrupt your rhythm. It cuts into productivity, delays creative flow, and turns quick tasks into frustrating experiences. When everything opens quickly, work feels smoother, content creation becomes easier, and your entire computer just feels more responsive.

Quick Overview
• We’ll look into what causes slow app launches, including cache overload and hardware constraints.
• You’ll learn simple fixes like adjusting startup apps, keeping macOS updated, and managing your disk space efficiently.
• This guide reflects global experiences—whether you’re facing network limits in rural areas or running design suites in high-paced cities.

Understanding Why Mac Apps Slow Down Over Time

macOS is built for smooth performance, but even the most optimized systems can lag. From design studios in Tokyo to audio editing setups in Nashville, users encounter delays when opening apps. The culprits are often the same—background processes, limited memory, or outdated drives.

Environmental factors also play a role. For instance, hardware in regions with unstable power supply or extreme temperatures tends to wear out faster. These conditions may not be obvious, but they quietly impact performance.

Common Reasons Behind Slow App Openings

Too Many Startup Items

If your Mac launches several apps the moment it boots, it eats up resources fast. A recent survey of 5,000 remote workers showed that nearly 40% of launch delays came from unnecessary startup apps. Trimming that list can make a huge difference.

Overflowing Cache and Temp Files

macOS saves temporary files to help apps load faster next time. But over time, this cache grows too large. A content studio in Paris deleted 15 GB of broken or outdated cache files and reported saving nearly two minutes each day on app launches.

Worn-Out or Fragmented Drives

Even fast SSDs aren’t immune to slowdowns. As files are constantly written and erased, these drives start showing signs of wear—especially when they’re nearly full.

Outdated macOS or Apps

System updates include patches that improve compatibility and performance. But in areas with slow internet, downloading updates may be delayed. This leads to compatibility issues and—ultimately—slower launches.

Low RAM or Overworked GPU

Creative professionals in Seoul or Barcelona often run browsers, editing software, and video calls all at once. When RAM runs out, your system starts using disk space to compensate. This swap causes noticeable delays in app performance.

Effective Steps to Make Mac Apps Open Faster

1. Review Startup Apps

Go to System Settings → General → Login Items. Remove anything you don’t need to launch at startup. A digital marketing team in Bangkok managed to reduce startup time by 25 seconds using this tip alone.

2. Keep macOS and Applications Updated

Always aim to run the latest version. In Toronto, an animation studio upgraded from Ventura 13.4 to 13.6 and noticed an 18% boost in performance, thanks to improved app compatibility and system efficiency.

3. Clear Cache and Temporary Files

Use built-in Storage Management tools or manually delete unnecessary files from ~/Library/Caches/. If you’re not familiar with these paths, a trusted maintenance app can help without the risk of deleting essential data.

4. Keep At Least 20% of Storage Free

When SSD usage crosses 80%, read/write speeds slow down. A gaming café in São Paulo moved old project files to an external drive, doubling the speed of their game launchers.

5. Upgrade RAM If Needed

Check your memory pressure in Activity Monitor. If it regularly hits 90% during app launches, consider a RAM upgrade. Music producers in Munich increased their RAM from 8 GB to 16 GB and cut Logic Pro’s launch time by 12 seconds.

6. Scan for Malware Regularly

Although less common on Mac, cryptojacking scripts can silently consume your CPU. A reputable antivirus tool, run every other week, helps keep things running smoothly.

7. Optimize Spotlight Indexing

When Spotlight is rebuilding its index, your Mac may lag. A Nairobi-based software team schedules their index rebuild monthly to avoid sudden slowdowns.

8. Spread Out Startup Tasks

Server admins in Sydney found that shifting their Time Machine backups and cloud syncs to non-peak hours helped free up system resources for app launches.

9. Reinstall Faulty Apps

If an app keeps crashing or takes forever to open—even after optimizations—it might be corrupted. A team in Warsaw reinstalled their video editing software and eliminated a 30-second delay caused by a damaged plug-in.

10. Use Activity Monitor to Spot Issues

Open Activity Monitor and check the CPU, Memory, and Disk tabs. If you see unusual spikes in unknown processes, end them and see if app launch speeds improve.

Quick List: What Helps and What Doesn’t

  • Trimming down your startup apps
  • Freeing up space by clearing cache
  • Upgrading RAM when necessary
  • Running malware scans regularly

Each of these actions brings visible results. While some require consistent effort, the benefits are well worth it if you depend on your Mac daily for work or study.

Real-World Stories from Different Corners of the Globe

Internet speed and device usage vary drastically. In Norway, updates download almost instantly, while users in rural Kenya may need hours. American creatives often invest in external GPUs, which help offload resource-heavy tasks like video rendering.

Meanwhile, freelance editors in India, many using entry-level MacBooks, reduce the number of login items to keep performance steady. While everyone faces different challenges, the goal remains the same: making each workday as efficient as possible.

Warning Signs You Shouldn’t Ignore

• Apps take over two minutes to open
• The spinning color wheel appears even with basic tasks
• Your Mac’s fan is loud, even when idle
• Opening system settings causes noticeable lag

If any of these sound familiar, don’t wait for the problem to grow. The earlier you act, the easier it is to restore performance.

Improving app launch times doesn’t need to be complex. By practicing regular upkeep, staying current with updates, and managing system resources wisely, users everywhere—from social media specialists in Manila to analysts in London—can enjoy faster, more reliable performance. A well-maintained system keeps ideas flowing and work on track without frustrating delays.

Setting Up Network Preferences on Mac for a Smoother Connection

Configuring Network Settings on Mac

Setting Up Network Preferences on Mac for a Smoother Connection

These days, most of our work, studies, and entertainment rely on a stable internet connection. Whether you’re attending a virtual meeting, uploading files, or managing remote tasks, your Mac’s network settings can either make things seamless or cause frustrating disruptions. If your connection drops in the middle of a call or slows to a crawl during an important upload, it’s time to take a closer look at your setup.

Quick Glance:
– Check the current status of your Wi-Fi or Ethernet using macOS settings.
– Secure your connection by prioritizing private or encrypted networks.
– Tweak advanced options like DNS and Proxy for better performance and access.
– Learn simple troubleshooting steps for common connection problems.
– Stay updated with tools that monitor network health and help you make adjustments.

The good news? You don’t need to be a tech wizard to make meaningful improvements. With a few settings adjustments and awareness of the tools already built into macOS, you can enjoy a safer, faster, and more reliable connection.

Why Network Settings Matter More Than You Think

Your Mac is only as strong as the connection it depends on. Having a reliable setup isn’t just about speed. A secure and properly configured network helps prevent data leaks, blocks snoopers, and ensures that your tasks aren’t interrupted by sudden disconnections.

For professionals, this can mean safeguarding sensitive files or maintaining high-quality video streams. For students and content creators, it’s about having fewer interruptions during live sessions or uploads. Wherever you are — from home offices to cafés — your setup needs to be ready for the demands of modern online life.

Check Your Current Network Status

Before you change any settings, take a moment to review how your Mac is currently connected:

  • Open System Settings and click Network.
  • Identify whether you’re using Wi-Fi or Ethernet.
  • If you’re on Wi-Fi, look for the number of signal bars. Low bars could signal weak strength.
  • If using Ethernet, check the Link Status to confirm it’s stable.

This step gives you a clear starting point. If you often face dropped calls or buffering during streams, your current setup may be falling short.

Customize Your Wi-Fi for a Better Experience

Stick to Trusted Networks

Connecting to any open Wi-Fi network you come across is risky. These are often unencrypted and easily exploited by attackers. If you travel or work remotely, always look for connections that are password-protected and use strong encryption like WPA3. Better yet, use your mobile hotspot when possible.

Set Your Preferred Networks

You can make your Mac automatically connect to secure and familiar networks by:

  • Going to the Network panel.
  • Clicking Wi-Fi, then Details beside the active network.
  • Dragging your most-used networks to the top of the list.

This is especially helpful if you move between locations regularly — like from your office to your home or a shared space.

Plug in for Consistency: Ethernet Setup

Wi-Fi is convenient, but Ethernet is more reliable. If your Mac is close to the router, take advantage of wired internet:

  • Use a gigabit cable and a USB-C adapter if your Mac needs one.
  • Open System Settings, go to Network, and select Ethernet.
  • Choose “Using DHCP” unless you’ve been assigned a static IP.

This is the best option for those in high-traffic apartments or for anyone who needs full-speed access, especially during uploads, backups, or live events.

Take Advantage of Advanced Options

Change Your DNS for Better Speed

Some websites load slowly not because of your internet speed, but due to how domain names are resolved. This is where DNS (Domain Name System) settings help.

Steps to update:

  • Under your active connection, click Details then DNS.
  • Add new DNS servers like 1.1.1.1 or 8.8.8.8.
  • Remove old entries if needed.

Many users in regions like South America or Southeast Asia report noticeably faster performance after changing DNS settings. This helps shorten the distance between your Mac and content servers.

Enable Proxy Settings When Necessary

Some companies use proxy servers to manage how data travels. These servers can filter traffic, enforce access rules, or provide additional privacy when needed.

To enable:

In the Network settings, under Details, go to the Proxies tab.

Input the server address and port given by your IT department.

Proxies also help if you’re working in places where certain websites are restricted or slow to load.

Best Practices for Stronger Connections

Following a few habits can improve performance and keep your network secure:

  • Keep macOS updated. System patches often include Wi-Fi and network fixes.
  • Place your router in a central location to ensure even signal coverage.
  • Don’t forget to change your router’s default login password.
  • Use the 5 GHz band instead of 2.4 GHz to avoid overcrowding, especially in apartment buildings.

These steps might seem simple, but they go a long way in keeping your online sessions smooth.

Other Settings You Should Know

Let’s break down a few more tools and steps you can use to ensure better connectivity:

Wi-Fi Recommendations: Your Mac can offer suggestions when it detects issues. Just click the Wi-Fi icon while holding the Option key.

Network Diagnostics Tool: Found in the Utilities folder, this tool can pinpoint weak signals or interference.

Custom Location Profiles: Create different profiles under the Network settings for home, office, or shared spaces.

Using these tools saves time when you troubleshoot or switch environments often.

Simple Troubleshooting You Can Do Yourself

Wi-Fi Cuts Out? Try This

  • Turn on Airplane Mode.
  • Wait about ten seconds.
  • Turn it off and reconnect.

This quick move often solves connectivity glitches when your Mac switches between routers.

Ethernet Issues?

  • Check that the cable is plugged in securely.
  • Make sure the port’s LED light is on.
  • Try a different cable or port if nothing works.

These checks are easy to miss but often solve stubborn problems in seconds.

Evening Slowdowns?

Peak hours often strain home networks. You’re likely sharing bandwidth with multiple devices streaming video or gaming.

  • Access your router settings via its IP address.
  • Activate Quality of Service (QoS) settings.
  • Prioritize your Mac to get better speed during critical tasks.

This feature helps ensure your connection isn’t affected by others in your household.

Global Security Standards and Why They Matter

Countries have their own ways of enforcing digital security. In Europe, penalties for data leaks are steep. In the U.S., identity theft is a growing issue. In Asia, targeted phishing attacks are common.

Here are safety tips you should follow:

  • Turn on your Firewall under System Settings → Security & Privacy.
  • Use a VPN if you’re in hotels, airports, or any public Wi-Fi area.
  • Avoid saving login credentials in browsers unless encrypted.

These habits help shield your data wherever you work from.

Tools That Track Performance

Want to know how fast your internet really is?

Download free network monitoring widgets from the Mac App Store.

Use the built-in Network Quality tool in macOS Ventura and newer. Open Terminal and type:

nginxCopyEditnetworkQuality

You’ll get real-time details on download speed, upload speed, and connection responsiveness. This tool can tell you if your provider’s speed matches what you’re paying for.

Bringing It All Together

A well-tuned network setup can boost productivity, reduce stress, and give you peace of mind. The time you invest in reviewing your Mac’s settings today will save you hours of frustration later. Whether you’re joining a high-stakes conference call or just trying to stream a video, having the right setup ensures you’re never left hanging.

Setting Up Microsoft Office on Mac

Setting Up Microsoft Office on Mac

How to Set Up Microsoft Office on a Mac

Many professionals rely on Mac devices every day. Whether you’re a student, nurse, researcher, or content creator, having the right productivity tools can make all the difference. Microsoft Office remains one of the most trusted suites worldwide, but setting it up on a Mac isn’t exactly the same as on a Windows PC.

A smooth installation helps avoid delays and errors, especially in teams working across different systems. One contributor from Brazil shared how skipping a small step led to a compatibility glitch with their international colleagues. After following this setup process, they were back on track with zero hiccups. This guide walks you through every key step—from installation to activation and customization—plus real solutions to common problems.

Quick Setup Preview

Here’s what you’ll learn in this guide:

  • What to prepare before installation
  • How to download and install Office
  • Steps to activate your license
  • Ways to personalize Office apps for better productivity
  • Helpful tips to speed up your workflow
  • How to fix common issues during use

Why Microsoft Office Matters for Mac Users

More organizations are shifting to Mac due to its durability and sleek interface. Office tools such as Word, Excel, PowerPoint, Outlook, and Teams are standard in many industries. For example, healthcare professionals can quickly export clinical reports using Word, while researchers benefit from Excel’s data-processing features. PowerPoint helps content creators prepare presentations efficiently.

When installed properly, collaboration with colleagues using different operating systems becomes seamless. You won’t have to worry whether your documents open correctly across platforms. Office also supports unique features on MacBook Pro like Touch Bar shortcuts, which make editing faster. The main goal is to ensure smooth communication and efficient document creation—wherever you’re working.

What to Prepare Before Installation

Before jumping into the setup, check that your Mac has at least 10 GB of free space. To keep everything running smoothly, 4 GB of RAM or more is recommended. Update your macOS to the latest version—found under System Preferences > Software Update.

Make sure you have your Microsoft account ready. If you’re using a subscription-based plan, you’ll need to sign in. For those using a work license, get the login info from your IT admin. A stable internet connection is also necessary to download and update files.

It’s smart to back up your files using Time Machine or an external drive before installing. Fully charge your MacBook to prevent interruptions caused by low battery. If you use an M1 or M2 chip, check whether the installer is designed for Apple Silicon or needs to run using Rosetta mode. These steps help prevent delays or setup errors later on.

How to Download and Install Microsoft Office

Follow these steps for a successful installation:

Open your browser – Safari, Chrome, or Edge will work.

Go to the official website – Type https://www.microsoft.com.

Sign in – Use the Microsoft account you prepared earlier.

Choose the version – If you’re using Office 365, click “Install Office” > “Office 365 apps.” If it’s a one-time purchase, look for “Office Home & Student.”

Start the download – A file called “Microsoft_Office_Installer.pkg” will appear.

Run the installer – Double-click the file and follow the prompts: Continue > Agree > Install. You may be asked to enter your Mac admin password.

Wait for the process to complete – This can take 5–10 minutes depending on your internet speed.

Finish setup – The apps will now be in your Applications folder. You can drag them to the Dock for quicker access.

For added security, go to System Preferences > Security & Privacy > General. Make sure installations from identified developers are allowed.

Activating Microsoft Office on Your Mac

Here’s how to activate your new Office apps:

Launch any Office app – Try opening Word, Excel, or PowerPoint.

Sign in when prompted – Use the Microsoft account linked to your subscription.

Enter a product key if needed – For one-time purchases, input the 25-character key provided.

Stay online – A secure connection is required to verify your license with Microsoft servers.

Check activation status – Go to Word/Excel/PowerPoint > About [App Name] and confirm the “Product Activated” message.

Enable automatic updates – From the Help menu, select “Check for Updates,” then turn on “Automatically keep Microsoft Apps up to date.”

If you’re using a corporate license, activation might happen through your company’s Company Portal. For accounts requiring two-step verification, follow the instructions from your IT support. If you encounter an error, note the error code—it can help you find quick answers on Microsoft’s help page.

Personalizing Microsoft Office on Mac

Microsoft Office on Mac allows a high degree of customization. Here are a few settings you can adjust:

Themes and Appearance
Go to Preferences > General to change your Office theme. You can pick “Colorful” or “Classic.” If you prefer darker layouts, enable Dark Mode through your macOS settings and Office will match.

Toolbars and Ribbon
Right-click on the toolbar and select “Customize Toolbar” to add shortcuts for your frequently used functions.

Default Save Locations
In Preferences > Save, set OneDrive or your local folder as your default destination for files.

Add-ins and Extensions
Click “Get Add-ins” under the Insert tab. You can install tools like Grammarly or Adobe Sign to enhance your workflow.

Keyboard Shortcuts
Check or customize shortcuts in Preferences > Keyboard Shortcuts. For example, you can modify Command + Shift + S to use “Save As.”

Tuning your setup helps speed things up and makes the workspace feel like your own.

Helpful Tips for Better Productivity

These simple tricks can improve how you use Office on a Mac:

Use Spotlight Search – Press Command + Space, type the app or file name, and it’ll open instantly.

Enable AutoSave – If you’re using OneDrive or SharePoint, turn this on from the top toolbar.

Try built-in templates – Choose from dozens of ready-made layouts for resumes, project schedules, and budgets.

Collaborate in real-time – Use the Comments and Track Changes features in Word or team editing in PowerPoint.

Dictate ideas quickly – Tap the Fn key twice to activate voice dictation when typing feels too slow.

Optimize storage with OneDrive – Activate Files On-Demand to view files without using up local space.

These steps help you stay efficient and make the most of Office tools.

Common Problems and Easy Fixes

Sometimes, things don’t go as planned. Here are some common issues and how to fix them:

App won’t open or keeps crashing
Restart your Mac first. If that doesn’t help, open Activity Monitor and force quit any Microsoft processes before trying again.

Activation issues
Error codes like 0x80070005 may appear. Open Keychain Access, search for “ADAL” or “Office15,” and delete the entries. Then, sign in again.

Update problems
Launch the Microsoft AutoUpdate tool in Applications > Microsoft Office. Click “Check for Updates” and install anything available.

OneDrive sync not working
Restart the OneDrive app. If it still won’t sync, try signing out and logging in again. Also, confirm you’re using the latest version.

Plugin issues with M1/M2 chips
Some older plugins don’t run properly on Apple Silicon. Right-click on the Office app, select “Get Info,” and check the “Open using Rosetta” box to resolve compatibility issues.

If anything else comes up, Microsoft’s support site usually has detailed steps, screenshots, and troubleshooting help.

Having Microsoft Office installed properly on your Mac can make a noticeable difference in your daily tasks. With the right setup, smooth activation, and useful customizations, your work becomes less stressful and more productive. Use the tools and tips above to take full control of your documents, presentations, and collaboration tasks—wherever you are.

Guide to External Storage for Mac

Guide to External Storage for Mac

External Storage for Mac Users: A Practical Guide for Everyday Needs

Whether you’re a content creator, a student, or someone who simply loves keeping things organized, managing your digital files on a Mac can become challenging over time. Internal storage fills up quickly, especially when dealing with high-resolution media, important documents, or creative projects. This is where external storage becomes a helpful companion—giving users more space, better control, and peace of mind.

Quick Overview:

External storage improves file organization and prevents data loss on your Mac.

Choosing the right type—HDD, SSD, USB drive, or memory card—depends on your needs and budget.

Understanding connection types and drive capacity helps you avoid compatibility issues and slow performance.

Understanding What External Storage Really Offers

An external drive connects to your Mac and provides more room for files, backups, or large projects. It could be a hard drive, solid-state drive, or even a compact USB flash drive. For creatives working on video editing or archiving, large-capacity drives are ideal. For light users, smaller USB drives or memory cards are often enough.

But there’s more to consider than just capacity. You also need to check the port compatibility—USB-C, USB-A, or Thunderbolt. Transfer speed depends on the interface, so it’s best to match your Mac’s port type with a supported drive. Faster interfaces like Thunderbolt 3 or 4 can significantly speed up your workflow.

Why Thoughtful Selection Matters

A well-chosen external drive can make work smoother and less stressful. Imagine losing a week’s worth of progress due to an unorganized system. That’s avoidable with good habits and the right tools. Users working in creative fields, education, or even small businesses will find external storage useful—not just for extra space but also for better structure and protection.

Some industries require strict privacy policies. External drives with password protection or encryption provide extra safety. That’s especially useful when dealing with sensitive or confidential files, whether personal or professional.

Key Types of External Storage

Hard Disk Drive (HDD)

Budget-friendly and ideal for storing large collections of files

Slower performance and more fragile due to moving parts

Solid-State Drive (SSD)

Fast and reliable with no moving parts

Ideal for demanding tasks like video editing

Usually more expensive than HDDs

USB Flash Drive

Small and portable, perfect for quick file transfers

Lower storage capacity, but enough for basic needs

Memory Cards (SD or microSD)

Useful for transferring photos and videos from cameras

Limited capacity but highly convenient for specific tasks

Choosing Based on Your Work and Budget

Main Purpose

If you regularly work with video files or edit photos, an SSD offers better speed. But if your main concern is storing music or family videos, an HDD might do the job. Students or office workers often prefer USB drives for quick and easy file sharing.

Budget Considerations

HDDs are generally more affordable, making them a good choice for bulk storage. SSDs cost more but deliver faster performance. Review models and user feedback before making a decision.

Compatibility and Ports

Match your external drive with your Mac’s ports. A Thunderbolt-compatible drive can speed things up significantly. For USB-C users, make sure the device either supports USB-C or includes an adapter.

Security Features

If you’re carrying sensitive data, drives with encryption or password protection add an extra layer of defense. This is especially useful for travel or collaborative environments.

Everyday Stories and Practical Use

A student using a MacBook Air needed a place for thesis files and video presentations. With limited internal space, a 1TB HDD was a smart and affordable fix. It made file organization easier without breaking the bank.

Meanwhile, a photographer who works on the go preferred a portable SSD with Thunderbolt support. The fast transfer speed helped with quick editing sessions, and the durable build meant fewer worries during travel.

In an office setting, shared external drives streamlined the process of exchanging large documents. A good folder system and regular backups kept everything running smoothly.

Formatting and Using the Drive

After buying your external drive, format it correctly for macOS. Use Disk Utility to choose formats like APFS or Mac OS Extended for Mac-exclusive use. If you’re planning to share files with Windows, exFAT is a safe bet.

Built-in tools like Time Machine simplify the backup process. You can also explore third-party apps for advanced control, such as scheduling backups or selecting specific folders. Test the drive first by transferring a few files and checking read/write speeds.

Estimating the Right Capacity

Not sure how much space you need? Think about the types of files you handle. Text documents require very little space, but videos or audio projects consume a lot. It’s a good idea to buy a drive with more room than you currently need to prepare for future growth.

Some models offer 4TB or more, great for long-term archiving. But remember—higher capacity doesn’t always mean better performance, especially for HDDs. Balance is key.

Helpful Tips to Remember

  • Check release dates—newer models often bring better performance.
  • Handle HDDs with care—they’re sensitive to drops.
  • Look for warranties—a good backup plan includes reliable customer support.
  • Keep folder structures organized for easy access and retrieval.

How It Helps Across Different Fields

Creative Work

Editors and videographers often rely on SSDs for fast performance. Some even use RAID setups for higher capacity and better speed, though these can be more complex and pricey.

Business and Office

If you’re managing contracts or private financial records, an external drive with security features can offer peace of mind. It’s easier to carry data securely when traveling.

Education and Research

Teachers and students gather loads of research material. External storage helps them manage everything without clogging the Mac’s internal drive. It’s also useful during presentations or remote learning.

Personal Use

For many, storing memories is the priority—family photos, personal journals, or scanned documents. External drives let you keep multiple backups. A combination of physical and cloud storage ensures better safety.

Keeping Your Drive in Good Condition

Avoid dust and overheating. If you’re using an HDD, don’t place it near edges where it can fall. While SSDs are tougher, it’s still wise to store them properly.

Check your drive’s health using macOS disk utilities. If performance drops or errors pop up, back it up right away. Many users replace their main drive every few years to avoid sudden failure.

Differences Around the World

In regions like North America or Europe, SSDs are more common among creatives. These areas also tend to enforce strict privacy rules, pushing users toward encrypted drives. In contrast, many users in Asia still prefer HDDs due to affordability.

In places with slow or unstable internet, physical backups are often more reliable than cloud services. Offline storage becomes vital in these settings.

Using Built-In Mac Tools

Time Machine automatically backs up your system and files. If you ever need to restore a previous version, it’s all there—no hassle. For more detailed control, third-party apps can customize backup frequency and target folders.

Many prefer to keep two drives—one for everyday backups and another stored safely in case of emergencies.

Protect What Matters Most

Sometimes the files are worth more than the device itself. Losing important work due to a failed drive is a major setback. Enable encryption if you move data often. Mac users can use FileVault for internal drives and specific settings for external ones.

Just remember—never forget your encryption password or recovery key. Without it, you might lose access permanently.

Staying Ahead with Tech

Entry-level Mac models often come with limited storage. That’s why more users turn to external options. Faster data transfer technologies and smaller SSDs are becoming the norm.

Products specifically designed for Macs now come pre-formatted, which means you can plug them in and get started immediately.

A Final Reminder

Every Mac user has different needs. By choosing your external storage wisely, you gain a long-term partner for your digital lifestyle. From managing daily documents to handling large media files, having the right tool makes all the difference.

Spend a little time choosing the right storage solution. It helps you stay organized, avoid data loss, and handle any project with confidence—whether you’re at home, in school, or out in the field.